Showing posts with label Steam Cakes. Show all posts

Wednesday, September 12, 2012

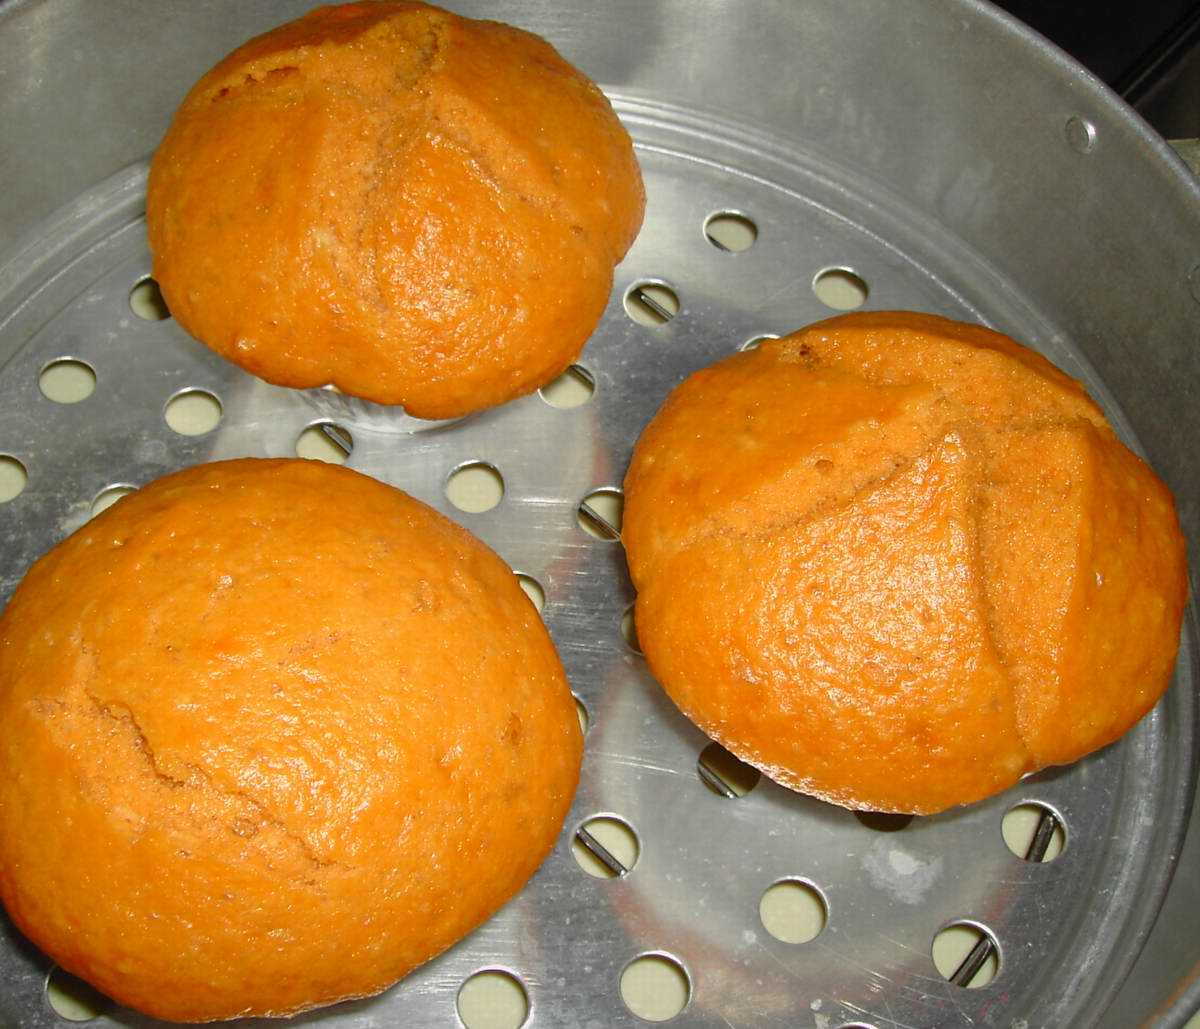
Sweet Potato Mantou

Made these in March 2012


I've bookmarked this recipe from Wendy's blog for the longest time but just couldn't find a chance to make it.  The body engine just refuse to ignite.  Along the way, this recipe was forgotten until I saw Wendy's Rose Mantou, so pretty!!

I tried my hands on rose shaping but see how they turned out, pathetic looking roses.  After the 2nd proof, the dough look nothing like roses, just a pile of mess :-(

Googled and found this easy to make rose method by Kristy. With some leftover lotus paste from last year's mooncake making, I used them as fillings here.


Though not perfect, these definitely look more like a flower (^_^)

Or should I just stay with croissant shaping?

Soft and fluffy inside, not too sweet too.  I like :-)
 
Sweet Potato Mantou Recipe
Ingredients
250g steamed sweet potato
150ml water (if using purple sweet potato, use 200ml water)
500g Pau/Hong Kong/Super Lite flour
1 tsp baking powder
100g sugar
50g shortening/Crisco (I used butter instead)
1/4 tsp salt
11g instant yeast (I used 3 tsp)

Method
  1. Mash sweet potato, or blitz sweet potato with 120ml water to get a fine paste.
  2. With balance of water, mix with yeast.
  3. Combine everything except shortening and mix to form a dough.
  4. Put in shortening and knead until dough is smooth. Add slightly more flour is dough is way too sticky to handle. If the dough is sticky but can retain its form, like not slacking down, just continue to knead, the gluten just hasn’t form, there’s no need to add extra flour.
  5. Cover and let dough proof until double, about 45 mins.
  6. Punch down dough and knead for 1-2 minutes.
  7. Divide dough into 50gm portions and shape accordingly.
  8. Cover and let the formed dough proof until doubled for another 45 minutes.
  9. Steam on high heat for 12 minutes.  

Thursday, December 2, 2010

Steamed Brownie

I'm not a brownie lover, especially when we're talking about dense and dry brownies.  But when I saw this in Edith's blog, I knew I must try it as it is steamed!  Yes, you've heard me alright, steamed.

This is a very simple recipe, no fuss at all.

It doesn't taste very much like the regular store bought brownie, the texture and taste are entirely different.

Please pardon the pictures as I used natural lightings but it was a scorching hot day and the rays were too strong.  I should have adjusted the brightness level but I was plain lazy.

Steamed Brownie
Source: Magic Steamed Cake
Recipe seen here

Ingredients
(A)
100g butter
85g chocolate

(B)
170g castor sugar
3 eggs (large)

(C)
20g cocoa powder
170g plain flour
1 1/4 tsp double action baking powder
1/2 tsp baking soda

(D)
120g chopped walnut

Method
  1. Melt chocolate and butter over double boiler till chocolate melted. Set aside.
  2. Whisk egg with sugar till sugar dissolved. Add in cooled chocolate mixture. Mix well.
  3. Sieve C and then it to the chocolate/egg mixture.
  4. Add the walnuts.
  5. Pour into a 8" X 8" square pan (or 22 X 20cm).
  6. Steam on high for 30 mins. Set aside to cool.
  7. Coat with ganache (I omit as I was lazy again)

Thursday, November 4, 2010

发糕

Not giving up despite so many "failures" here and here.  The texture is good, just that the 发糕 refused to "huat"/bloom.  I'm still home alone with the kids so no long posting, will just let the pictures do the "talking".


Saturday, April 3, 2010

Fa Gao 发糕 Encore

This is my 4th attempt on 发糕 using fermented dough, the result just got worst. Sigh...  The criss-cross I've made prior to steaming just disappeared!


Texture is still soft and fluffy.

I didn't want to waste more time and effort making my 5th 发糕 using fermented dough so I made one with a really simple recipe from our local DJ, Fenying's blog.

I get slight cracks on top but still not ideal.

This is fellow blogger, Hugbear's 发糕, using Fenying's recipe too but look how beautifully they bloomed!  This is what I'm hoping to achieve.  I'm not going to give up, will keep on trying.  Ganbate!!

Thursday, March 25, 2010

Fa Gao (发糕) with fermented dough

Can someone tell me why my 发糕 doesn't bloom (ie crack on the surface)?  I've tried making 发糕 several times but always end up with unsatisfactory result.  I've posted 2 entries here and here, and these are the better looking ones.  They are nothing like those sold commercially, so beautifully bloomed.

Aunty A makes very delicious sweet potato 发糕.  Recently, I decided to try her fermented dough recipe.  Alright, I confess, I made these 3 times within 2 weeks, not that I love eating 发糕 but I get very annoyed when I just couldn't get it right!

This is my most recent attempt - today!  I made these with borrowed rattan baskets from Aunty A.  They didn't bloom as nicely as Aunty A's but good enough for me (scroll down to see my 1st and 2nd attempts and you'll understand why).

However the inside was very kuih like, not fluffy at all, very unlike my first 2 tries.

My first attempt, I used plastic bowls and steamed in 3 bowls.  They overflowed and domed like mushrooms.  Nevertheless, texture was soft and fluffy.

Made them again and used 4 bowls instead.  Perfect size but no perfect bloom.

For a person who doesn't like 发糕 to eat up half a piece, don't you think this is a good recipe?

I suspect it might be the way I mix/stir in the batter, or I might have overmixed the batter.  I'll not give up, will try to achieve a perfect 发糕 one day.  Wish me luck!

Tuesday, January 12, 2010

Steamed Milk Cake

Fresh from the steamer!  Yes, I just made these like 20 mins ago for our tea today.  This is really a very simple recipe and the best thing is, no mixer needed!


The last time I made these, I filled the cup to 3/4 full and had a dome shaped cake.  Today, I filled up to 4/5 full and they smile very nicely to me :-)


I should have used paper liners instead of muffin cups as the cups seemed to have puffed up a little due to the heat.

Steamed Milk Cake
(Recipe adapted from Aunty Yochana's blog, makes about 6 cupcakes)

Ingredients
170 gm. Fresh Milk (I used a mixture of Full Cream and Skim Milk)
60 gm. sugar
100 gm. cake flour
20 gm. rice flour
2 tsp. double-action baking powder

Method
  1. Use a hand whisk to whisk fresh milk with sugar until the sugar has dissolved.
  2. Add in remaining ingredients and stir well.
  3. Spoon into small cups lined with paper cups.
  4. Steam at high heat for 10 - 13 mins. or until cooked.
  5. Remove and cool on wire rack.

Monday, November 16, 2009

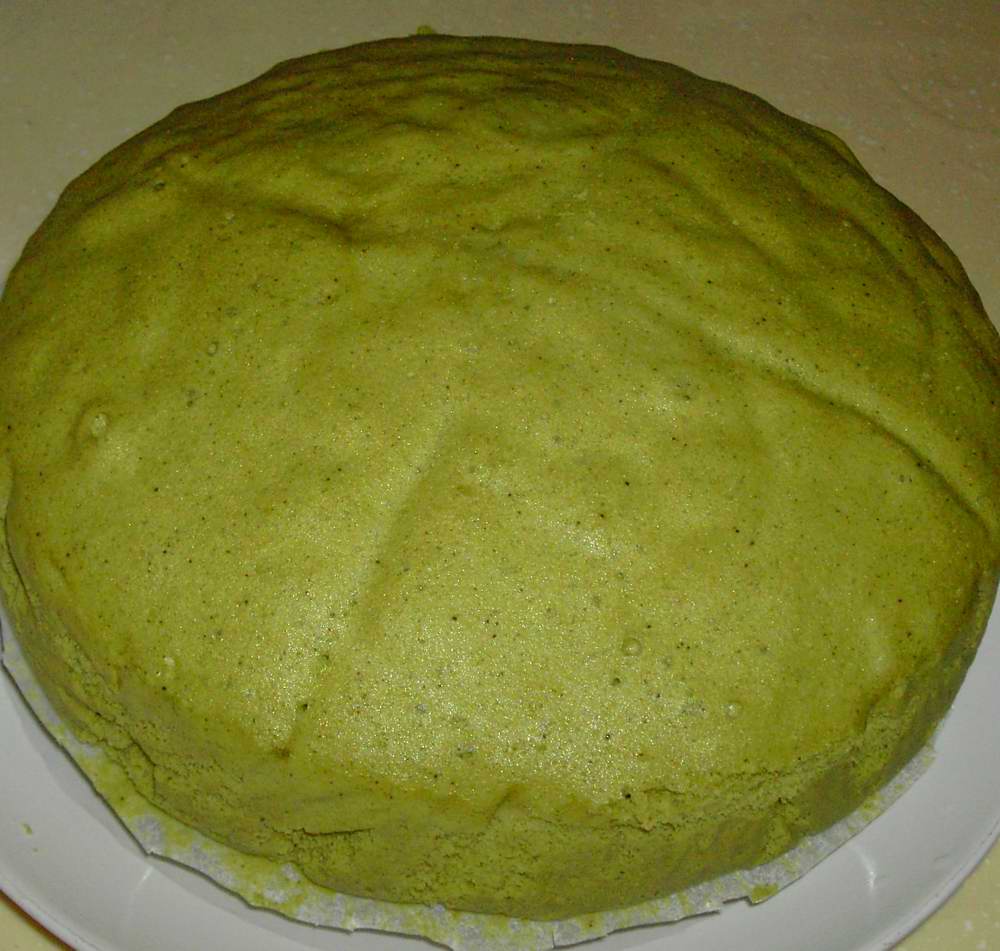
Steamed Matcha Sponge Cake

Sister E wanted to finish up her expiring matcha and gave me an idea to add matcha into steamed sponge cake. I made this yesterday since Sister E came by in the afternoon to help me out for a few hours as DH was still in Philippines.

The batter was rather thick after adding the flour. I should have reduced the flour accordingly since I've added in 5 teaspoon of matcha. Instead of sprinkling sugar to make the cross, I used a chopstick dipped into oil and "cut" the batter prior to baking. It didn't work hahaha!

Everytime I make this, I replaced hong kong flour with cake flour. But I got slightly adventurous and decided to use plain flour instead. I sifted the flour 3 times before mixing into the beaten eggs, hoping that it will turn out soft and fluffy.

The cake was soft but not exactly fluffy (then again, I've bought some from stalls with such texture too). I suspect it was due to the addition of matcha or probably my weighing scale has gone bonkers (I'm using a cheap kitchen scale) and I've added more flour then needed. For my family, they ain't fussy eaters so they don't mind this texture ;-)

Steamed Matcha Sponge Cake (抹茶鸡蛋糕)
Ingredients
(A)
4 eggs
180g caster sugar

(B)
230g plain flour
5 heaped tsp matcha
*sifted 3X

(C)
75ml Sarsi (or any fizzy drinks)

Method

  1. Use high speed beat eggs till fluffy.
  2. Add in sugar gradually and continue beating till well- blended, turn off the power.
  3. Fold in the flour in 3 portions.
  4. Add in Ingredients C and mix well.
  5. Pour mixture into 20cm round bamboo basket lined with glass paper till 90% full.
  6. Sprinkle a handful of sugar such that it forms a cross on the surface of mixture.
  7. Steam over high heat for half an hour.

Wednesday, October 14, 2009

Steamed Sponge Cake with Meat Floss

Another interesting recipe I found on the net, it's a steamed sponge cake with meat floss! Since my kids like meat floss, I just had to make this.


I didn't have any self raising flour at home so I used plain flour and added baking powder and baking soda. Also, I reduced the sugar slightly and it's just right for my family. The cake is soft and fluffy but slightly messy to eat as the floss on the top layer kept falling off. I'll omit the top layer the next time I make this.

Ingredients
(A)
100g plain flour
2 tsp baking powder
1/2 tsp baking soda
pinch of salt

(B)
3 eggs
40g caster sugar
1/2 tsp cream of tartar

(C)
30ml milk
30g vegetable oil

(D)
50g pork floss

Method
  1. Combine the flour, baking powder and salt and sift twice.
  2. Beat the eggs, sugar and cream of tartar until it turns thick and pale.
  3. Fold in the sifted flour mixture.
  4. Fold in the milk and oil.
  5. Pour half the batter into a 8-in round tin lined with baking sheet.
  6. Sprinkle half of the pork floss on the batter.
  7. Pour another half of the batter into the tin and sprinkle the remaining pork floss on the surface.
  8. Steam for 15 - 20 minutes.
  9. Serve.

Tuesday, September 8, 2009

Steamed Chocolate Cake II

The kids are having their school holidays this week and Nephew D and T came to my place today so I made this steamed chocolate cake for them. I've always wanted to try this recipe with milk but just didn't have the courage to do so as I'm afraid of failures. I do not usually stock up on evaporated milk but after seeing The Little Teochew's modified recipe, I decided to use milk too.

End result is not much different from using evaporated milk ;-)

For the frosting, instead of melting chocolate in my previous attempt, I added 2 tablespoon of Nutella spread to the whipped cream. Taste yummy too!

Ingredients
185g corn/sunflower oil
180g castor sugar (you may use up to 230g)
200ml fresh/UHT milk
2 eggs, lightly beaten
110g cake flour (you may use plain flour)
45g good quality unsweetened cocoa powder (you may use up to 60g cocoa powder)
1/2 tsp baking powder
1/2 tsp baking soda

Method

  1. Heat up the steamer.
  2. Lined and greased a 8 or 9 inch baking pan.
  3. Combine castor sugar, milk, oil and eggs in a large mixing bowl. Stir till well mix.
  4. Sift the flour, cocoa powder, baking powder and baking soda into a large mixing bowl.
  5. Pour the eggs mixture over the flour and stir till well mix (cake batter should be runny).
  6. Pour the batter into prepared pan, cover the top of the pan losely with a piece of aluminuim foil.
  7. Steam over medium heat for 40 - 45 mins.
  8. Cool the cake in pan before turning out for further decoration.

Tuesday, August 11, 2009

Chocolate Frosting and Ganache

S passed me an exersaucer and I was supposed to pass it to L for his son, J. The last time I met J was at his full month celebration but DH saw him in April and commented that J is as big sized as DD3. Thinking that J may be able to climb out of the exersaucer, I thought it's better to return it to S for her sister-in-law who's due in Aug.

It is very difficult to arrange a timing where both of us are free as her kids have enrichment classes over the weekends and mine has ballet on Sundays. With the long weekend in Singapore, I arranged to drop by her place yesterday. Since I will be back for the long weekend and with C and L staying in the same estate, S invited them to come along and we had a mini potluck gathering cum birthday celebration for J who will be turning 1 at the end of the month.

I did the steam moist chocolate cake upon I's request. As I was out the whole of National Day(Singapore's National Day falls on 9 Aug), I had to steam the cake early in the morning before leaving home. After sending brother M to the airport, we got home just in time to say the pledge. Whipped some non dairy cream and mixed with some melted chocolate to get the chocolate cream filling. Feeling lazy, I just sliced the cake into 2 layers instead of 3 and added some bananas. As compared to my cake baked last week, this cake is definitely more appetizing because of the thick layer of bananas.

As I do not want the chocolate ganache to flow down to the cake board and cause a mess, I lined the cake board with cling wrap. But when I tried to remove it, I accidentally removed a portion of the cream and ganache!

So I had to pipe some cream around the cake to cover up the "holes".

Over at S's place, she has got some strawberries leftover (pureed some for strawberry chiffon cake which I'll blog separately) so I just used some for garnishing.

This cake definitely needs a better touch up as I'm really bad and needs to polish up on my decorating skills.

I don't know why but this corner of the cake has got holes at the base. The rest are okay but I was too busy cutting and distributing the cake that I forgot to take more pics. Nevertheless, this cake was well received and J even asked his mom C to learn how to make this ;-)

I've got a foolproof chocolate ganache using Nestle cream but I don't usually stock up on this so I've been searching for a chocolate ganache without using cream and I found it here. Original recipe calls for 95g dark chocolate but I used only 60g as I'm basically not a chocolate person and prefer something less chocolatey.

Cream Filling
Ingredients
200g non-dairy whipping cream, whipped
30g dark chocolate
1 tbsp milk

Method
  1. Melt chocolate and milk in a microwave/over a basin of hot water and set aside. Leave to cool slightly.
  2. Add it into whipped cream and mix till incorporated.
Ingredients
60g chocolate
25g butter
55g skim milk

Method
  1. Warm butter and chopped chocolate over a basin of hot water and stir till a smooth chocolate paste is formed.
  2. Stir in milk a third at a time.
  3. Stirring the ganache constantly till it is slightly warm, smooth and runny, pour this ganache over the chilled and set cake from above. Tilt pan left and right gently to even out the ganache. Chill till set.

Friday, July 31, 2009

Steam Moist Chocolate Cake


A forumer, Dralion, from Kitchen Capers shared this recipe and many whom tried gave thumbs up for this super duper moist cake. I'm not a chocolate fan but having itchy hands, I made this and my family likes it. I made it so often then until DH had enough of it. Think the last time I made this was for DD1's birthday last July.

This is the cake on it's own without any decoration or frostings. We usually eat it plain but today, I felt like having something different.

With a bunch of bananas ripening fast and kids won't be home till late, I sliced the cake into 3 layers and filled it up with sliced bananas and fresh cream. As usual, I couldn't do a nice frosting so I had to use chocolate ganache to cover up my flaws.


I started pouring 1/2 portion of the ganache and tilt the cake board slightly for the ganache to flow down. Then I scooped a tablespoon at a time and pour over the edges of the cake to cover the corners I've missed. I had wanted to cover the whole cake with chocolate ganache but I do not know how it's done so neatly. So I just left it as it is.

Yes, I've been stingy in my cream as I'm not a cream person. If someone offers me a cake with thick cream, I'll definitely scrape it away before indulging in the cake. And in order to get a thin cream layer, I had to slice the bananas really thin as well.

This is the non-dairy whipping cream I used for the frosting. I've yet to venture into dairy whippingcream :P

The original recipe yields a very huge cake. Recipe posted here is already halved (and modified as I've reduced sugar and cocoa powder), which is good for 8" or 9" cake pan. Remember to use good quality cocoa powder as this is truly a very delish cake. You don't want to ruin the cake with some low grade cocoa powder which leaves an aftertaste.

Steam moist chocolate cake
Ingredients

185g unsalted butter or corn/sunflower oil **
180g castor sugar (you may use up to 230g)
200ml evaporated milk (low fat or full cream)
2 eggs, lightly beaten
110g cake flour (you may use plain flour)
45g good quality unsweetened cocoa powder (you may use up to 60g cocoa powder)
1/2 tsp baking powder
1/2 tsp baking soda
1/2 tsp vanilla extract

Method

  1. Heat up the steamer.
  2. Lined and greased a 8 or 9 inch baking pan.
  3. Combine castor sugar, evaporated milk, vanilla extract or essence and butter in a saucepan. Stir over low heat until sugar is dissolved and butter is melted, off fire and leave to cool.
  4. Add the beaten eggs into the evaporated milk mixture and stir till well mix.
  5. Sift the flour, cocoa powder, baking powder and baking soda into a large mixing bowl.
  6. Pour the eggs mixture over the flour and stir till well mix (cake batter should be runny).
  7. Pour the batter into prepared pan, cover the top of the pan losely with a piece of aluminuim foil.
  8. Steam over medium heat for 45 mins.
  9. Cool the cake in pan before turning out for further decoration.

Notes
** If using corn oil simply mix all ingredients up and stir till well blended.

Thursday, July 16, 2009

Steamed Rice Flour Cake (Wan Koh Kueh)

This is a long overdue post. I made this 2 weeks ago but forgot to blog about it. As a child, I've always like Wan Koh Kueh, especially so with orange sugar, loads of them. I've been searching for a recipe but most recipes I found requires wine yeast. I do not have wine yeast and do not know where to find them, so I had to give all these recipes a miss.

I finally found one recipe without wine yeast but using a starter dough instead. This recipes uses double action baking powder, after mixing in the ingredients, leave to cool, add more baking powder and let it stand for 1 hour. Add sugar to mix and pour into mould, then stand again for another 30 mins before steaming.

Followed the recipe closely, even the timing but my kueh didn't turn out well. Maybe because my double acting baking powder was close to expiry, thus losing it's effect?

I'm not posting the recipe here but will definitely try it again with my newly bought baking powder to see if this recipe works. If it doesn't, then I've got to look for new recipes to try.


Friday, May 22, 2009

Fa Gao II


Sister E deliberately took measurements for me when she made Fa Gao last Saturday since my Fa Gao making hasn't been very successful. I decided to give it another try and I must say it's so much better than my previous attempts. However, the texture is still quite dense. Is Fa Gao supposed to be dense? I have no idea as I don't like Fa Gao and I've not eaten this for a long time.

I was supposed to make a cross on the batter before putting them into the steamer but I was way too excited and forgot this step. Nevertheless, the Fa Gao did bloom :)

Recipe
Method
330g Self Raising Flour
180g sugar
1 egg
380ml

Method
  1. Mix Self Raising Flour & Brown sugar into a mixing bowl.
  2. Add in water and egg, mix until well-combined.
  3. Pour batter into cups till 90% full, steam on high heat for 30 minutes or till cooked.

Monday, May 18, 2009

Steamed Cream Cracker Cake


While I was at the supermarket last week, I bought a packet of Cream Cracker biscuits as I've got this recipe for the longest time and as usual, procrastinating baking again. Personally, I'll very much prefer a steamed cake over a baked cake. I don't know if there is any scientific proof but I always thought steamed cakes ain't as heaty as baked cakes. Anyone knows?

The original recipe calls for baking in a 7" pan but I baked it in my 8" round and this explains why it's such a short cake.


Texture of this cake is soft and moist but not as fragrant as the Marie Biscuit Cake. Then again, it's so much easier to crush cream cracker than marie biscuits so I'm sticking to this recipe for now. And most importantly, the children enjoy this cake, even dd3 kept asking for more :)

Monday, May 11, 2009

Sweet Potato Bun - Steamed


After cooking some sweet potato soup and used up 2 for the chips, I have 3 more left in my pantry. I have this recipe on hand but I can't remember where it came from so if you know the orignator, please let me know so I can credit him/her accordingly.


When I did this last time, I used to plait it but I'm too lazy to do anything fanciful as:
  1. I don't have much time to spare
  2. I'm using my AMC steamer which can only accommodate a 8" round cake pan
This is a very soft and fluffy bun although the look is not impressive. This shows that I've a lot to improve on :P


Sweet Potato Buns
Ingredients
300g sweet potato, cooked and mashed
160g plain flour, sifted
80g caster sugar
40ml corn oil
1 tsp instant yeast

Method

  1. Add mashed sweet potato, sifted flour, sugar and yeast in a large mixing bowl and mix well.
  2. Add oil and knead till smooth and shinny.
  3. Divide dough into small portions of 50 gm each and shape as required.
  4. Place buns on lined or greased baking tray for 50-60 mins or until dough is double in size.
  5. Steam on high heat for 10 - 15 mins.