Showing posts with label Simple Cooked Food. Show all posts

Tuesday, May 29, 2012

Apple Cider Vinegar Chicken Wings

I've not done justice to this recipe as the chicken was without skin, making the dish look less appetising.  Despite cooking this several times, I always forget to take a picture of it until today.  So here it is, Apple Cider Vinegar Chicken that is soft and tender.


Apple Cider Vinegar Chicken
Ingredients
6 large chicken wings, approx 700g (separated at joint)
2 tbsp dark soya sauce
2 tbsp light soya sauce
1 tbsp of sugar, or honey
3 - 4 tbsp of apple cider (add more if you like)
Enough water to cover the meat
1 thumb-size ginger (optional)

Method
  1. Wash and place cut chicken wings into a heavy stainless pot (I cooked using my AMC pot). 
  2. Add all seasonings and water into the pot.   Stir to mix well.
  3. Using medium fire, cook till sauce is boiling.
  4. Reduce fire and simmer for 30 to 40 mins.
  5. Serve with fluffy rice.

Thursday, May 24, 2012

Cooking rice with AMC Pot

I used to have a small rice cooker but I find it occupies too much counter space.  My parents needed another rice cooker so I passed them mine since the rice cooker only serves one purpose.

When the children are still young, my way of cooking rice is to steam it.  I love the lingering rice smell in the kitchen.  But as the kids grow, I need to cook more rice so steaming gets a bit tricky as that means I'll need to use a bigger pot.

During our holidays in Australia, we cooked rice using the pots in the service apartment we stayed.  It wasn't that difficult, just need to ensure that when the water boils, it is time to turn down the flame and simmer till the rice is cooked.

Using the same logic, I experimented with cooking rice using my AMC pot.  After some trial and error, I'm finally able to cook rice the easy way.  If you are also a AMC user and wish to try it out, here are the steps.


Using medium fire, cook rice till 12 o'clock.  The water should be boiling inside (do not open lid).

Turn to medium low flame and cook till 3 o'clock.  Turn the heat to low and simmer for another 10 - 15 mins.  Turn off fire and let the needle retract back to 12 o'clock.

Open lid to fluff up rice and serve.

Wednesday, February 1, 2012

Hong Zao Mian Xian (红槽面线)

Prior to knowing DH, I've never eaten any food cooked with red glutinuous wine (红槽). My first encounter with 红槽 was at my inlaws' place. It is a tradition for his family to eat 红槽面线 during birthdays. And being new in the family, although I do not like the taste of it, I was obliged to finish up the food. I could still recall that moment, it took me ages to finish up a small bowl of mee suah. Over the years, I grew accustomed to the taste and in fact, I'm loving it (only the wine, not the dregs though).

DH been bugging me to learn to cook this dish. I consulted MIL on recipe but as you know, most old folks cook without recipes. She merely taught me the steps and the rest is my own estimation.

Presently to you my very first 红槽面线


Still incomparable to MIL's cooking but DH and kids commented it is nice. Yes, now I can finally cook a Hockchew/Foochow dish ;-)

Hong Zao Mian Xian (红槽面线)
Serves 2A+3C

Ingredients (A)
17 - 20 drumlets (can use chicken thigh, drumsticks, wings or whole chicken)
3 tbsp red glutinous wine dregs (红槽) - I used wine instead of dregs
1 tbsp light soy sauce
1 tsp sesame oil
* Marinate together for at least 1 hour (my MIL did not marinate her chicken)

Ingredients (B)
2-3 shallots, peeled and roughly chopped (I double this as I like the flavor of shallots)
4 slices ginger, cut to thin strips
3-4 dried mushrooms, washed and soaked till soft (my MIL didn't add mushrooms)
500 - 750ml red glutinuous wine (红槽酒)
2 tbsp sesame oil
1.5 - 2 litre water


Method
  1. Marinate chicken and set aside for at least an hour.
  2. Slice mushroom into thin strips.
  3. Heat up a pot with sesame oil. Add shallot and ginger, fry till soft and fragrant.
  4. Add in chicken and mushrooms, fry till the chicken are slightly cooked.
  5. Pour in 2 cups (approx. 500ml) red glutinuous wine and remaining marinade, if any. Mix till all parts of chicken are evenly coated.
  6. Pour in sufficient water and bring to a boil, cook for another 10 mins.
  7. Reduce heat and simmer for 1 hour. Add more wine if needed.
  8. Season to taste (read notes below).

Preparing Mee Suah

  1. Boil some water in a separate pot.
  2. Add mee suah and loosen the strands with a pair of chopsticks. Cook for approximately 1 minute.
  3. Drain mee suah and set in a bowl.
  4. Arrange the cooked chicken and mushrooms on top of mee suah and ladle some soup over it.
  5. You may also serve it with a poached egg.

Notes
If your mee suah is very salty, there is no need to add more seasonings into your soup.

Tuesday, June 21, 2011

Quick Plum Sauce Chicken

Pardon my disappearing act as I've been really busy.  School holidays started in late May and I've got 3 monsters at home 24/7.  It is a chore to have them home, creating havoc and driving me up the wall.  It is worst when I have to do marketing, imagine lugging 3 young kids to the supermarket.  A simple 30 mins trip turned into an hour or more.  Oh well, that's life.  I choose to have 3 kids so I'm not complaining.  Just have to grit my teeth for these few years.  On a happier note, we have just returned from a 5 days trip to Malaysia :-)

Here's sharing a dish that my family likes, Plum Sauce Chicken.  I've been cooking this quick and simple dish whenever I run out of ideas.

The meat is very tender and it taste great with plum sauce. However, DH doesn't appreciate the wine in it so I've reduced the quantity by 2/3.  Feel free to add more wine if your family enjoys it.

Quick Sour Plum Sauce Chicken
Adapted from Mary Moh, with slight modifications

Ingredients A
14 mid-joint chicken wings
1.5 Tablespoon plum sauce
2.5 Tablespoon tomato sauce
2.5 Tablespoon soya sauce
3/4 Tablespoon sugar
1 Tablespoon rice wine
3/4 Tablespoon oyster sauce
250ml water

Ingredients B (thickening) - optional
1 Tablespoon corn flour
60ml water

Method
  1. Mix ingredients A together in a pot and boil for 30 mins.
  2. For a thicken sauce, mix 1 tablespoon corn flour with 60ml water.  Mix well and pour into the pot of chicken.  Mix well and let it boil again to thicken the sauce. Turn off the fire and serve immediately.

Thursday, April 21, 2011

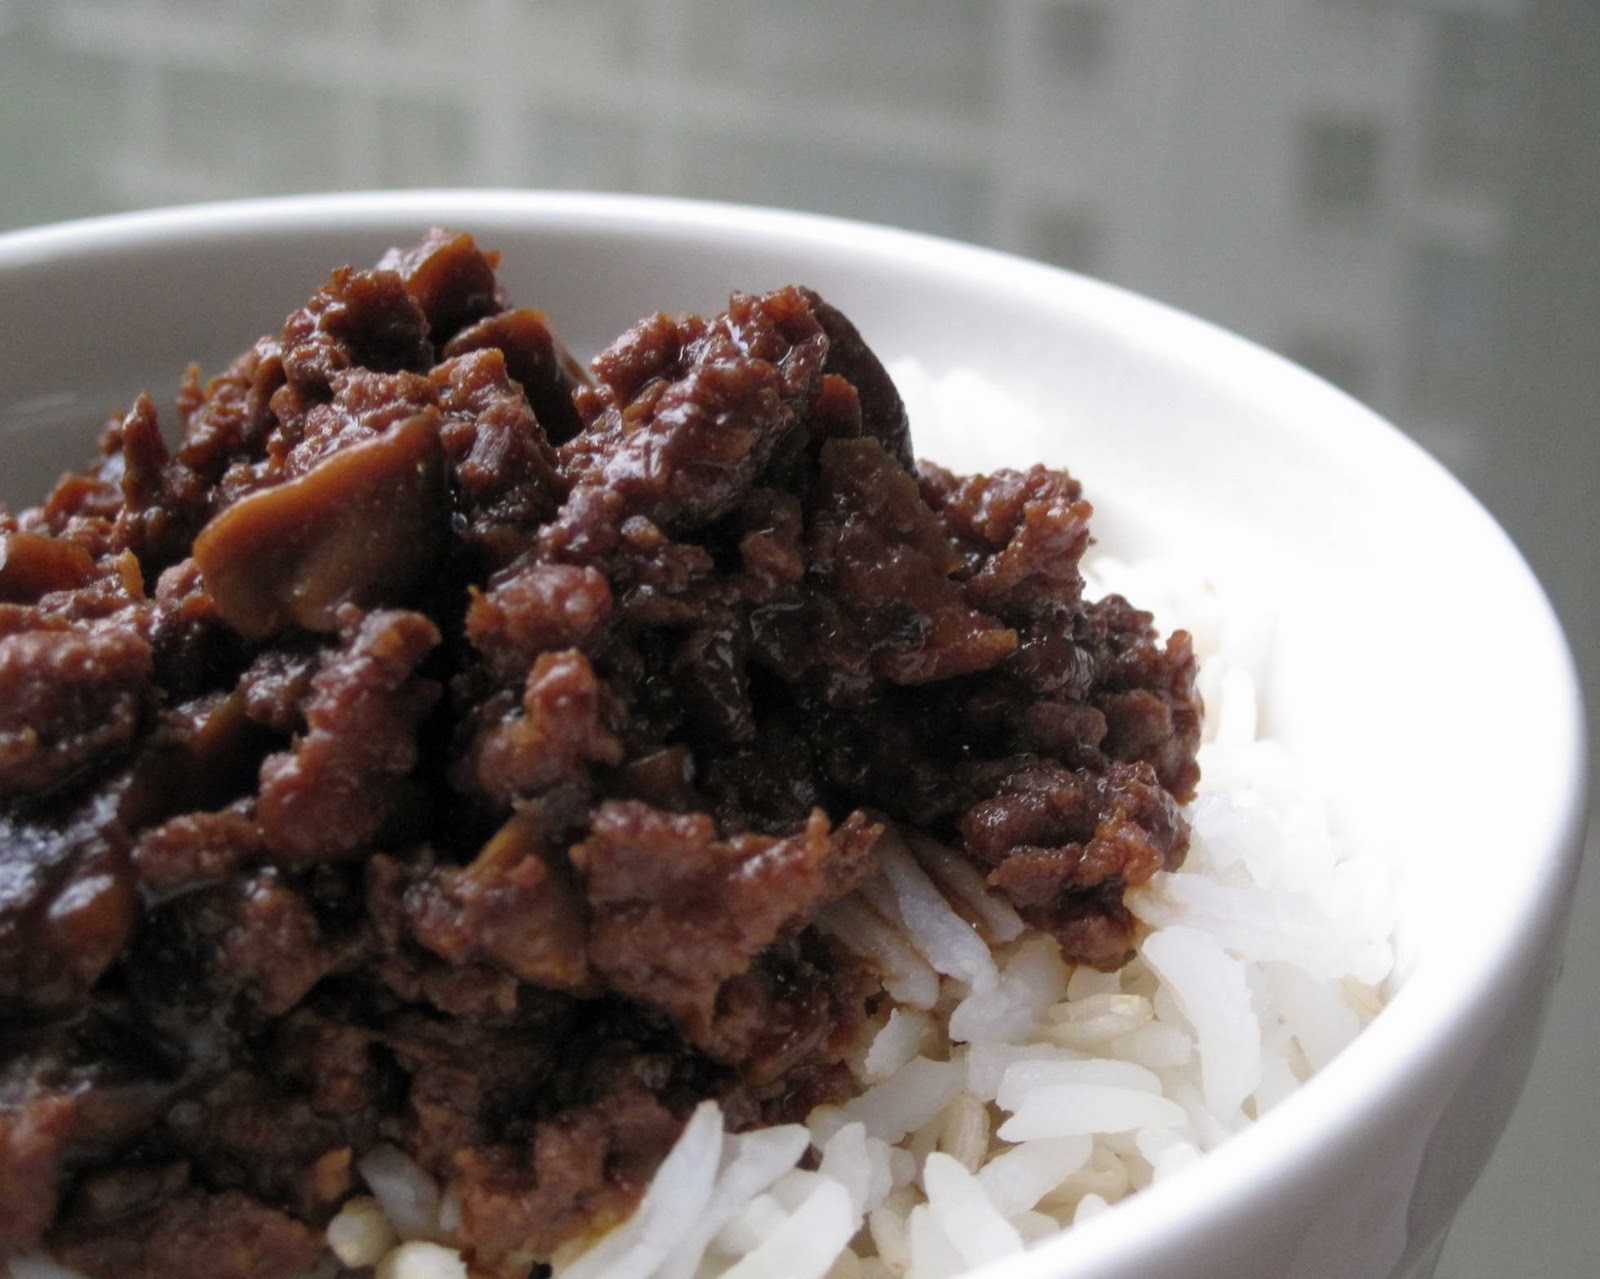
Braised Mushroom Meat Sauce (香菇卤肉燥)

During my working days, I have a very close colleague turned friend.  In fact, we are still in touch now, meeting twice yearly on our birthdays.  Probably because we are so close, our many likes and dislikes are similar too.  I used to eat pork, but she doesn't.  So over time, I'm a convert.

After she left the company, I started to eat pork again since my lunch partners are pork eaters.  I never knew pork could be so tasty, didn't know what I've been missing hahaha!  But there is one exception, I won't order minced meat dishes from outside, for I've heard of so much horror stories about what goes into it.

Sometime back, I saw Shirley's Braised Mushroom Meat Sauce recipe and decided to give it a try.  I love mushrooms and added a few more than suggested.

I "ran out" of spring onions so the pictures look slightly bare.  Actually, I grow my own spring onions but they are not fully grown yet.

My family enjoys this dish and whenever I have any leftovers, they go into the freezer.  Great with instant noodles too!  There was also an occassion where I added the frozen stash to fry mee hoon :-)

I've modified the recipe slightly by reducing a small amount of seasonings and did the lazy way out (Shirley removed the fried shallots in Step 3, I didn't).  For those interested in the original recipe, please refer to Shirley's blog here.

Ingredients 
300g minced pork
7 - 8 dried mushrooms
4 - 5 red shallots/small red onions, sliced
100ml - 120ml water/chicken stock

Seasonings
1/2 tsp light soy sauce
1/2 tsp dark soy sauce
1/2 tsp sugar
1/4 tsp sesame oil
some corn flour
* you may add more to your liking

Sauce
1 tbsp Oyster Sauce
1 tbsp Dark Soya Sauce
1 1/2 tbsp Light Soya Sauce
1/2 tbsp Rock Sugar
Dash of White Pepper
Pinch of 5 spice powder (we don't like it too strong so I only added a pinch)
1 tbsp Rice Wine (I used ginger wine)

Method
  1. Season minced pork with seasonings.
  2. Soak mushrooms in water and dice into small cubes.
  3. In a heated wok, add 1 - 2 tbsp oil, fry sliced shallots until brown and crispy.
  4. Add mushroom and fry till fragrant.  Add minced meat and stir fry until 70% cooked. 
  5. Add sauce ingredients (please feel free to adjust according to taste).
  6. Add water/chicken stock and simmer on low heat for one hour. Turn off heat and if possible leave the minced meat over night (I usually cook this in the morning with my thermal pot and we have it for dinner).
  7. Heat up again before serving.  If a thicker texture is preferred, thicken with a little potato starch solution.

Tuesday, March 29, 2011

Apple Cider Vinegar Chicken


In a mothers' forum I'm visiting, LC shared this and it was a hit with all who tried this recipe.  I decided to give it a try but decided to reduce vinegar for I do not know how my kids will response to vinegar cooking.  Seasoning was also reduced as I reckon it might be too salty for my family.

I've cooked this several times, with chicken quarters and mid-joint chicken wings.  My kids prefer the latter, maybe because the skin was intact.  DH on the other hand shuns away from vinegar so I never cook this whenever he comes home for dinner.

If you like pork trotters vinegar, I'm sure you will like this too.  And a plus point is, you don't even need to marinate the meat in advance!   Quick and easy!

Apple Cider Vinegar Chicken
Ingredients
300 - 400g chicken wing or baby pork rib (here I used chicken quarters, deskined)
1 1/4 tbsp dark soya sauce (originally 2 tbsp)
1 1/4 tbsp light soya sauce (originally 2 tbsp)
1 tbsp of sugar, or honey
2- 3 tbsp of apple cider (originally 7 tbsp)
Enough water to cover the meat

Method
  1. Wash and cut chicken quarters into cubes.
  2. Add chicken pieces and all seasonings in a pot.  Using medium fire, cook till sauce is boiling.  Reduce fire and simmer for 30 to 40 mins.

Thursday, December 16, 2010

Prawn Fritters With Vegetables

When night falls, I have many thoughts in my mind but when I'm sitting in front of the computer, my mind goes blank.  Blogging definitely needs inspiration to keep the entry interesting.  But today, my brain needs some rest.  I've been sleeping for 4 hours daily for the past 2 months as there are simply too many chores.  No, my house is not in tip top condition but the daily marketing, cooking, washing, cleaning, laundry is enough to exhaust me.  And yes, DH is overseas again, I think I only get to see him for a week or two in a month.  With DH away, I'm taking over his chores and I'm completely exhausted by 11pm.  And when I lie on the bed at 1am - 2am (alright, I skived, I did catch some movies on cable/surf the net for some ME TIME), my brain just can't stop working, thinking of the many events that happened and what's going to happen/prepare the next day.  Then , I'm in the state of insomnia again, almost every night.  I do not know what time I fall asleep but I will be awaken by DD3 for feed at least once and by 7am, the whole family is awake.

I initially thought this will be a short and quick entry but it took me almost 2 hours to complete.  Gosh, better stop now and get my butt moving, need to walk the dog.


Prawn Fritters With Vegetable Recipe
Recipe by Anncoo

Ingredients
100g prawns
1 onion - shredded (I used small onions)
1 small Carrot - grated or cut to thin match sticks
some finely cut spring onion or coriander leaves
Some salt and pepper

For the Batter
Ingredients
1 Egg yolk with enough water to make 150ml
3/4 cup Plain flour
1 1/2 tbsp Rice flour

Method


    1. Remove shell and vein from prawns then cut to cubes not too small. Season with some pepper and salt.
    2. Combine the batter ingredients together in a measuring cup and blend into a smooth texture paste.
    3. Add enough oil (its usually sunflower/corn oil in my pantry) for shallow frying with two drops of sesame oil in wok.
    1.  In a medium bowl add prawn cubes, grated carrot, shredded onions and spring onion together.
    1. Then add about 2-3 tbsp of batter (not too thick) into the prawn mixture.
    2. Drop the coated prawn mixture in small portion into hot oil gently with a fork and spoon and shallow fry till golden brown. Dish up and drain oil well.
    3. Serve with mayonnaise or dipping sauce.

    Tuesday, November 30, 2010

    Deep Fried Oyster Mushrooms

    Busy is the word to describe me now.  The kids started their 5 weeks long school holiday and I dread the thought of going to the supermarket with them.  And to make matters worse, my fridge konked out on me last week and I went into a frenzy.

    Anyway, to cut things short, here's sharing what I've cooked weeks ago, deep fried oyster mushroom.  I was first introduced to this by my mother.  She visited Malaysia on a 1 day tour and they were brought to a Chinese restaurant for dinner.  When this dish was served, it was wiped up almost instantly, everyone at the table love this!  She bought a few premix packs from them and whenever she cooks this at home, it's always the first dish to disappear from our dinning table.  Yes, it is that good.

    As far as I'm concern, I try to avoid premix as I do not know what goes into the pack.  My kids love this so I try to replicate it at home.  Well, it didn't turn out like my mom's but good enough for my kids.


    Deep Fried Oyster Mushrooms
    Ingredients
    1 punnet oyster mushroom
    6 tbsp rice flour
    6 tbsp corn flour
    1/2 tsp curry powder
    1/2 tsp salt
    pepper to taste
    oil for deep frying

    Method
    1. Clean oyster mushroom and tear length-wise into smaller pieces, do not wash.
    2. Mix rice flour, corn flour, curry powder, salt and pepper in a bowl, mix well.
    3. Heat up your wok or deep-fryer with cooking oil.  When the oil is hot, turn to medium heat.
    4. Coat mushroom with flour mixture and fry till golden brown.
    5. Drain on paper towel and serve immediately.

    Wednesday, November 17, 2010

    Fried Bee Hoon

    DH is basically not an outdoor person, he very much prefers to stay at home or bring the kids to the mall.  I remember my childhood days, when I was young, my father used to bring us to East Coast Park for a swim.  I love family outings and always looking forward to it.

    Now that I have started my own family, I like to them to be near nature, to learn to appreciate the tiny little things in life, and not simply be attracted to electronic games/TV programs.  I'm glad to say that I've successfully "converted" DH to be more outdoor going :-)

    For our weekends, we usually spend our days at the Singapore Zoo or at the beach.  Thanks to DS2's swimming lesson, we now spend most of our afternoon at the beach after his lessons :-)

    DD1 enjoying herself, didn't even realised I was taking a picture of her.  Don't ask me why her hands are up, I asked, she said she just felt good doing that.

    The siblings cooperated and dug a big hole, hoping to fill it up when the tide comes in.

    My dainty little girl, initially whining about the sand in her shoes, but soon got used to it and decided to join in the fun.

    My boring old man, playing iPad at the beach :'-|

    Have to be fair to DH, don't want to do an injustice to him, he "dumped" his iPad and played frisbee with the kids :-) 

    That's my dog's frisbee by the way, we bought a few from Australia when DH was studying there.  We've tried many different types of frisbee, from "branded" (with much rave and great reviews) to simply no brands, and we found that this suit us best.  It is light weight and easy on the grip (for both dog and human).  As it wears and tears relatively fast, I got brother K to buy as many as he could when he visits Australia.  And when we travelled to Australia for our own holiday again, we will wipe up whatever we can find at the store.  Over the years, we bought over 2 dozens (4 more left in our storeroom now).

    Not much food variety at the beach so I always try to prepare some simple food for our lunch/dinner there.  It is usually fried bee hoon as I find it very versatile, adding whatever ingredients I have sitting in my fridge.  Whenever I cook a one pot dish, I prefer to add in more veggies but DH prefers his been hoon "plain".  And I think I've been cooking this too regularly, so much so that DH is requesting that I stop cooking this for a while :P

    Honestly speaking, I don't think there are too much ingredients, I'll very much prefer to add more but I was left with just some cabbage and a small carrot.  Anyway, food is secondary.  Most importantly, the family had a great time bonding together :-)

    Sunday, October 31, 2010

    Chicken Butter Rice (Japanese Style)

    During my working days, a few like-minded colleagues (turned friends) visit Japanese restaurants on a regular basis, tucking in on our favourite bento and sushi.  Oh.. those were the days I missed.

    My kids love Japanese food too.  Whenever I declare the kitchen is closed for the day, their usual request is sushi for dinner.  I enjoy eating Japanese food but DH prefers Chinese food.  So if we're eating out as a family, we always end up in this Chinese restaurant at the airport.
      
    I chanced upon this Japanese style butter rice and made it for the kids (seasonings reduced). They love it, except for DD3. You should see how she grimaced at her first bite :P But then again, she will still finish her bowl of rice served.

    DD3 requested to have a picture taken, with her bowl :-)
     
    Chicken Butter Rice
    (recipe adapted from here)
    Serves 2

    Ingredients
    1 chicken breast, cut to bite size
    8 shimeji mushrooms, sliced thinly/chucks
    1 onion, cut into small pieces
    1 tbsp of butter
    1 tbsp of vegetable oil
    2 cups cooked rice

    Sauce

    1/2 tsp grated ginger
    1 tbsp of ketchup
    2 tbsp of soy sauce
    1 tbsp of homemade rice wine (Sake used originally)

    Method
    1. Clean and wash chicken. Pat dry chicken with kitchen towel and cut to bite size pieces (I marinated the chicken with light soy sauce and pepper for 1 hour prior to cooking - optional)
    2. Wash and cut mushrooms into slices.
    3. Mix grated ginger, ketchup, soy sauce and rice wine in a small bowl and set aside.
    4. Heat pan and add oil, fry onion until soft.
    5. Add chicken and cook till chicken is slightly browned.
    6. Add shimeji mushrooms and cook till tender.
    7. Pour in mixed ketchup, soy sauce and rice wine to the pan and mix well. This should take about a minute or 2 to mix everything together. Remove from heat.
    8. Scoop cooked rice into a big mixing bowl while the rice is still hot.  Add in butter and mix till the butter has melted completely.
    9. Add cooked chicken and mushrooms from the frying pan into the mixing bowl. Mix everything together.
    10. Serve immediately.

    Wednesday, October 27, 2010

    Braised Chicken with Miso Paste

    Many happenings at home and with DH overseas, I'm struggling alone so I'm just going to post another quick entry here, just to show my presence.

    This is another recipe with miso paste and my kids love it.  Thanks Anncoo for sharing this great recipe!  I've reduced the seasonings slightly as my cooking is relatively bland.

    Braised Chicken with Miso Paste
    Ingredients
    500g Chicken Thigh - cut to pieces
    250g Potatoes - remove skin and cut to pieces
    1/2 tbsp Dark soy sauce
    1 tbsp Miso paste
    1/2 tbsp Garlic - chopped
    1/2 tsp Sugar
    125 - 150ml Water (estimated)

    Seasonings
    1/4 tsp sesame oil
    1/4 tsp salt
    1/4 tsp pepper
    1/2 tbsp Dark soy sauce

    Method
    1. Clean and wash chicken (I like mine with skin removed). Pat dry chicken with kitchen towel and cut to pieces. Marinate chicken with seasonings for 1-2 hours.
    2. Heat enough oil in wok, add chopped garlic and miso paste and fry for a while till aromatic.
    3. Add in chicken pieces with another 1/2 tbsp dark soy sauce and sugar, continue to stir fry chicken well.
    4. Lastly add in cut potatoes, mix well with the chicken, add in just enough water to cover the chicken. Bring water to boil and cover with lid, lower heat and simmer for about 20 mins or potatoes soften.
    5. Add a little more water when the sauce dries up a little.
    6. Lastly add corn flour with water as thickening. (optional - I omit).
    7. Serve hot with rice.

    Thursday, September 16, 2010

    Steamed Miso Cod Fish

    I'm happy to receive comments in my blog but I'm not making enough effort to reply to all the comments.  With blogging and blog hopping, it is already quite a handful to me.  In fact, sometimes I don't even have time to publish the comments.  Reason being, I'll only publish if I know I have time to reply to the comments, else I won't, in case I forget to reply (that happened so many times).  I don't know how other bloggers do it, especially the popular bloggers (they have easily over 50 comments in a day!).  Honestly speaking, I don't think I have the time to manage that.  So, I'm happy with what I have now.  Sour grapes?  No, definitely not.  Just in contradictions.  Hahaha!

    Enough of my thoughts.  I've never tried using miso paste for any other cooking besides soup so when I saw Sonia's posting here, I knew I just have to try it.  I love cod fish!

    I have 2 pieces of cod fish in my freezer so I cooked this for lunch (weeks back).  I reduced the usage of miso paste slightly as I was worried it may end up too salty.  In addition, I always use more water when steaming fish as my kids like to add the sauce into their rice.

    I cannot disagree with Sonia, this is a perfect combination!

    Ingredients
    350g Cod fish (tail part), sliced
    6 red dates, washed and sliced
    some ginger, shredded

    Seasonings
    1 tbsp Japanese Miso paste
    2 - 3 tbsp water
    A dash of Pepper
    A few drops of sesame oil

    Garnishing
    Spring onions, shredded (soak in water to get nice curl)

    Method
    1. Place cod fish, red dates and ginger in a steaming plate.
    2. Mix all seasonings in a small bowl and spoon over cod fillet/steak.
    3. Steam over high heat for about 5 - 7 mins.
    4. Garnish with spring onions and serve immediately.

    Friday, September 3, 2010

    Char Siew/Siu

    I've got a broken nail while peeling potatoes so can't do much cooking and washing :'(  And I'm typing this with one hand, feels so handicapped.

    Just to share what I've cooked for dinner some weeks ago, homemade char siew/char siu.  I always use my trusted AMC recipe but today I decided to try Baking Mum's recipe with some modifcations.  The taste is very much the same. 

    Can you spot my little one hiding at a corner?  She was trying to pinch some food off the plate.  My kids love homemade Char Siew/Siu :-)

    Char Siew
    Ingredients
    500 gm pork shoulder (wu hua)
    1 tbsp oyster sauce
    1 tbsp light soy sauce
    1 tbsp dark soy sauce
    2 tbsp sugar
    1 tbsp rice wine
    1/2 tsp sesame oil
    some pepper
    a few cloves of garlic

    PS: For instructions and step-by-step pictures, please visit Baking Mum's blog for I didn't follow her instructions as I cooked using AMC method.

    Sunday, August 29, 2010

    Egg Fried Rice

    DH was away in China and I had to take over his daily chores, that includes walking the dog at night, sweeping and mopping the floor.  I was already up to my neck with my daily chores and with the additional work, I had merely 4 hours sleep each night.  Totally completely exhausted...  I'm glad DH is finally home ;-)

    During this period, I cooked very simple meals and this was what we had on one of the nights, Egg Fried Rice.  I have carbo, protein and greens, good enough to pose off as a complete meal :P

    Egg Fried Rice
    Ingredients
    2 cloves garlic, chopped
    5 cloves shallot, chopped (I used more shallot as I can't take too much garlic)
    3 cups cooked rice
    2 - 3 eggs
    some corn/sunflower oil
    salt and pepper to taste

    Method
    1. Heat up some oil in a wok and add garlic and shallot, cook till fragrant.
    2. Add in rice and let it sit for a minute without disturbing. Using medium high heat, stir fry rice (you will hear the hissing sound), add salt and pepper to taste.
    3. Crack in 2 eggs, gently break the egg yolks with a spatula, then let is sit for a minute without disturbing.
    4. Using a spatula, flatten the rice a little and flip over like a pancake (similar to cooking okonomiyaki) to cook the eggs.
    5. Cook for about 2 minutes before breaking up the rice with a spatula.  Dish up and serve with desired vegetables.
    And before I end, please allow me to brag :P

    DD3 folded her own clothes!  If you have been following my blog, you know I involve my kids alot in my day to day chores and clothes folding is just one of them. She has been observing me and when requested to do it herself, I usually wouldn't reject unless I'm pressed for time.  I always give her simple tasks like folding the hankies or her brother's boxer shorts.  But this time, she wanted to fold her own clothes and I just let her be.  I was busy folding the rest of the clothes and didn't pay much attention to her.  Within minutes, she carried this stack of clothes to me, smiling.  Happy.

    Though there were only 3 pieces (2 tees and 1 skirt), I think she did a great job.  A little messy from the top view but then again, how much can I expect from a  2.5 years old toddler, to be able to fold and stack them up like this?  My life as a SAHM is truly worthwhile ^-^

    Tuesday, August 17, 2010

    Tomato and Egg Stir Fry


    Tomato and egg stir fry is a common dish in my family. I always stock up on tomatoes and eggs so when I run out of ideas what to cook, this is it.  I removed the skin of the tomatoes prior to frying as it is simply too chewy for the little ones and it takes them ages to swallow.  Pampered?  Maybe...

    I used to cook this with garlic but due to health reasons, I have to cut down on garlic intake so I replaced it with shallots instead and added some dried shrimps too.  Dried shrimps really helped to flavour this dish further and the kids prefer this version too.

    Tomato and Egg Stir Fry
    Ingredients

    A handful dried shrimps (soaked in water to soften and minced/pounded)
    2 - 3 shallots, sliced
    2 Large tomatoes, peeled and sliced/cut into wedges
    2 Eggs, beaten
    1 tsp Light soy sauce (salt may be used as an alternative)
    dash of pepper
    some vegetable oil

    Method
    1. Prepare a pot of boiling water.
    2. Make a cross-shaped cut on the bottom of the tomatoes.
    3. Add tomatoes into boiling water, cook for 1 -  2 mins.  Remove to cool and peel the tomato skin.  Slice or cut into wedges.
    4. Heat up wok with some oil.
    5. Toss in shallots and dried shrimps, stir-fry till fragrant and a light golden brown on the shallots.
    6. Add beaten egg and scramble till 70% cooked. 
    7. Add in tomatoes and give it a quick stir.
    8. Add light soy sauce and pepper to taste.
    9. Serve.

    Friday, July 30, 2010

    Steamed Fish Paste with Tofu

    My mom taught me this simple dish with only 2 main ingredients, fish paste and tofu.  You can also add in some spring onions and red chilli for colours.

    This is a very versatile recipe, can throw in some vegetables like chopped spinach or grated carrots.

    Sometimes, I will throw in an egg too.  My kids love this dish :-)

    If you get bored eating them steamed, you can also cut the steamed fish paste tofu into smaller pieces and pan fry it (not suitable with chopped spinach/grated carrots though).

    Steamed Fish Paste with Tofu
    Ingredients
    1/2 block silken tofu (can use egg tofu too)
    100g fish paste

    Optional
    chopped spring onions
    chopped red chilli
    1 beaten egg
    chopped spinach
    grated carrot
    salt and pepper to taste (I didn't add salt as the fish paste is already salted)
    sesame oil

    Method
    1. In a mixing bowl, mash tofu with fish paste.
    2. Add in some chopped spring onions, chilli, salt (optional) and pepper to taste.
    3. Spread the mixture evenly in a bowl.
    4. Steam for 10 minutes.

    Wednesday, July 28, 2010

    Hearty Oatmeals

    I am looking forward to today as I have made arrangement to meet up with DO and TW.  DD3 was down with a chesty cough and a low grade fever for several days.  That fever made me a panda as I was up several times a night taking her temperature (no medication given since it's low grade fever).  After a 10 days course of antibiotic, she finally recovered.  Phew!  Just when I thought things were getting back on track, DS2 caught the same virus and is down too!  I've kept him away from school since Monday to prevent him from spreading the germs.  To make things worse, DD3 started running a fever again yesterday :-(  Though MIL has agreed to take care of the children while I go "partying", I felt irresponsible to leave my sick kids with her, as she has to cook and take care of FIL, niece and nephew.  After contemplating, I decided not to join my girlfriends (PS: DO, I'm sorry I couldn't make it today, owe you one.  HAPPY BIRTHDAY girl!).

    With an unpredictable weather, it is tough to bring them to the supermarket.  I just make do with whatever ingredients I have in the fridge to cook something simple, and that is usually oatmeal.

    When I was young, my mom fed me with oats on an almost daily basis and I hated it!  It was only when I started working, then I started to appreciate eating them.

    This is a sweet version, cooked with brown sugar and served with cream cracker/soda biscuits and dried fruits.

    Savoury version, cooked with frozen stock, leftover braised pork belly (I removed the fats) and some vegetables.  When cooking savoury oats, I like to crack in an egg.

    I do not measure out the ingredients when I cook oatmeals.  Just put oats and water in a pot, cover and cook on medium low fire.  Bring to boil.  Add in sugar to taste.  Remove from heat and let it stand for 5 mins before serving.

    PS: You may use more or less water, depending on what consistency you want.

    Wednesday, July 21, 2010

    Fried Hokkien Prawn Noodles


    We love Fried Hokkien Prawn Noodles but when we eat this outside, we always eat it on it's own and there are not much greens in it.  So I try to replicate this at home but incorporated more veggies.  Instead of using chives, I usually replaced it with spring onions/chye sim (cai xin/choysum). So it's not so authentic but I don't really care as long as my family gets to eat some greens ;-)


    You may adjust the stock used according.  I prefer my noodle to be more "soupy" whereas DH likes it dry so I had to cook his portion separately.

    Hokkien Prawns Noodles Recipe
    (serves 2A + 3C)
    Ingredients
    (A)
    200g prawns, heads and shells removed, keeping tail intact
    100g streaky pork
    2 squids
    250g pork ribs
    1.5 litre water

    (B)
    250g flat noodles
    250g thick bee hoon (soaked in warm water for 10 - 15 minutes)
    400g chye sim
    200g bean sprouts
    4 - 6 cloves garlic, chopped
    2 eggs

    (C)
    1.5 tbsp fish sauce
    1.5 tbsp light soya sauce
    1/2 tsp sugar
    * you may increase the sauce by another 1/2 tbsp

    (D)
    some calamansi/lime

    Method
    Cooking the soup base
    1. Blanch pork ribs and set aside.
    2. In a pot/wok, heat up some oil and fry prawn shells and heads till fragrant.  Set aside for later use.
    3. Bring 1.5 litre of water to boil, add in squid and prawns to scald (less than 1 minute).  Remove and add in streaky pork, cover and cook for 10 mins.  Put aside all ingredients to cool and cut into thin strips.
    4. Add pork ribs and fried prawn shells and heads into soup and cook for 10 mins, reduce to small flame and simmer for 1 hour.
    Frying the noodles
    1. Heat up some oil in a wok/pot and add in garlic, cook till fragrant.
    2. Crack in 2 eggs, stir to break up the eggs.
    3. Add 1  - 1.5 cup of stock and add in soaked thick bee hoon to cook till the been hoon absorb the stock.
    4. Add in flat noodles and fry for a minute before adding in chye sim.  Pour in in another 1/2 cup of stock.  Cover and simmer for 2 - 3 mins.
    5. Add in cut ingredients and bean sprouts, season to taste.  Fry for another 1 minute and add in 1/2 cup of stock.  Mix evenly and dish up.
    6. Squeeze some calamansi juice over the noodles and serve immediately.

    Thursday, July 15, 2010

    Simple Fried Rice

    It had been a fairly bad week for me and I'm glad DH is finally home, to share and listen to my sorrows.

    When I thought what I've gone through was bad, I received a call about DL and her family.  Her single income DH  took the rap for someone else's mistakes and is currently jobless.  They can hardly make ends meet now.  So what are my problems compared to hers?  My problems seem so insignificant and I appeared too petty for the way I behaved.  What I thought were problems no longer pose as issues now, in fact, they appear more like a blessing to me after listening to DL's story.  I don't wish to be reminded of my blessings through them, but unfortunately, that is usually the case.  I pray for their well-being and I hope her husband finds a job soon.

    Whenever my brain goes into hibernation, I end up cooking fried rice, usually with long beans and ham (I always have them in my freezer, for "emergencies").  I dislike feeding my family with processed food but if I really have to, I always convince myself that it is still better than eating outside food, at least it is home-cooked.

     
    Simple Fried Rice
    Ingredients
    3 pcs Honey Baked Ham, diced/julienned (can use luncheon meat too)
    200g long beans, finely cut
    1 small carrot, julienned
    2 cloves garlic, chopped
    5 cloves shallot, chopped
    some corn/sunflower oil
    1 tbsp dark soy sauce
    some pepper
    some salt to taste (optional)
    3 cups cooked rice

    Method
    1. Heat up some oil in a wok and add 1/2 portion garlic and shallot, cook till fragrant. Add in carrot, stir fry briefly and add in long beans. Lastly, add in ham to stir fry.  Dish out and set aside.
    2. In the same wok, heat up some oil and add balance garlic and shallot. Add in rice and let it sit for a minute without disturbing.  Using medium high heat, stir fry rice (you will hear the hissing sound), add dark soy sauce and pepper to taste. Stir well and finally add in the fried ham and long beans. Mix well and dish up. Serve hot.

    Thursday, June 17, 2010

    Stir Fry Zucchini


    I never knew the existence of zucchini (also known as squash or courgette) until I had DD1 (that was about 8 years ago).  While googling for some toddler recipes, I came across this interesting ingredient - zucchini, and decided to hunt it down in Singapore.  After visiting several supermarkets, I finally found it.  When I first cooked this in DD1's porridge, I fell in love with it.  From that moment, I've been cooking zucchini often.

    To me, I feel that zucchini is a very western food as they are mainly cooked/baked in bread, cakes, casseroles, stuffed recipes, soups etc...  I decided to cook zucchini the Chinese way, which is just stir fry.

    Stir Fry Zucchini
    Ingredients
    3 slices of bacon, shredded
    1 onion, shredded
    1 zucchini, diced
    1 tsp sugar
    salt to taste
    some water

    Method
    1. Heat pan on medium heat and toss in bacon, fry till fragrant.
    2. Add onion and cook till soft.
    3. Add in diced zucchini and mix well in the pan.  Pour in some water and allow the entire mixture to simmer till zucchini turn soft.  Add sugar, mix well. 
    4. Lastly, add salt to taste.