Friday, December 31, 2010

Dad's Birthday cum Christmas Party

I've totally, completely forgotten about Dad's birthday this year.  I don't know what I'm busy with since I haven't been cooking nor baking much, but I just seem to be busier.

Last December, I baked Dad a Santa Claus cake and I was planning to bake him a log cake this year.  But after some thoughts, I decided against it and decided to bake him a proper birthday cake.

His birthday celebration was initially planned on Boxing Day but was brought forward to Christmas Day instead.  I had promised to meet up with AH for a gathering in her house on Christmas Eve, with some ex-colleagues whom I've not met for years.  Although she's staying at the other end of Singapore and to travel there by public transport with 3 kids, I think it will probably take me 2 hours from point to point.  I'm so looking forward to this gathering as I've not met them since I left the company in Feb 2008.  But with the change in date, I couldn't make it for the gathering. (Sorry AH, you organise another one next year, I'll try to make it, I promise).

After googling online for some cake ideas, I decided to bake him a longevity cake and found this design that I think I might be able to complete.  Though it doesn't look as presentable, I think it is still acceptable, at least for a home baked cake.

I didn't want to buy any colour paste just for this so I added some mixed berries jam, which I got the idea from Bakertan.  The colour didn't turn out too vibrant, but I think it is still acceptable.

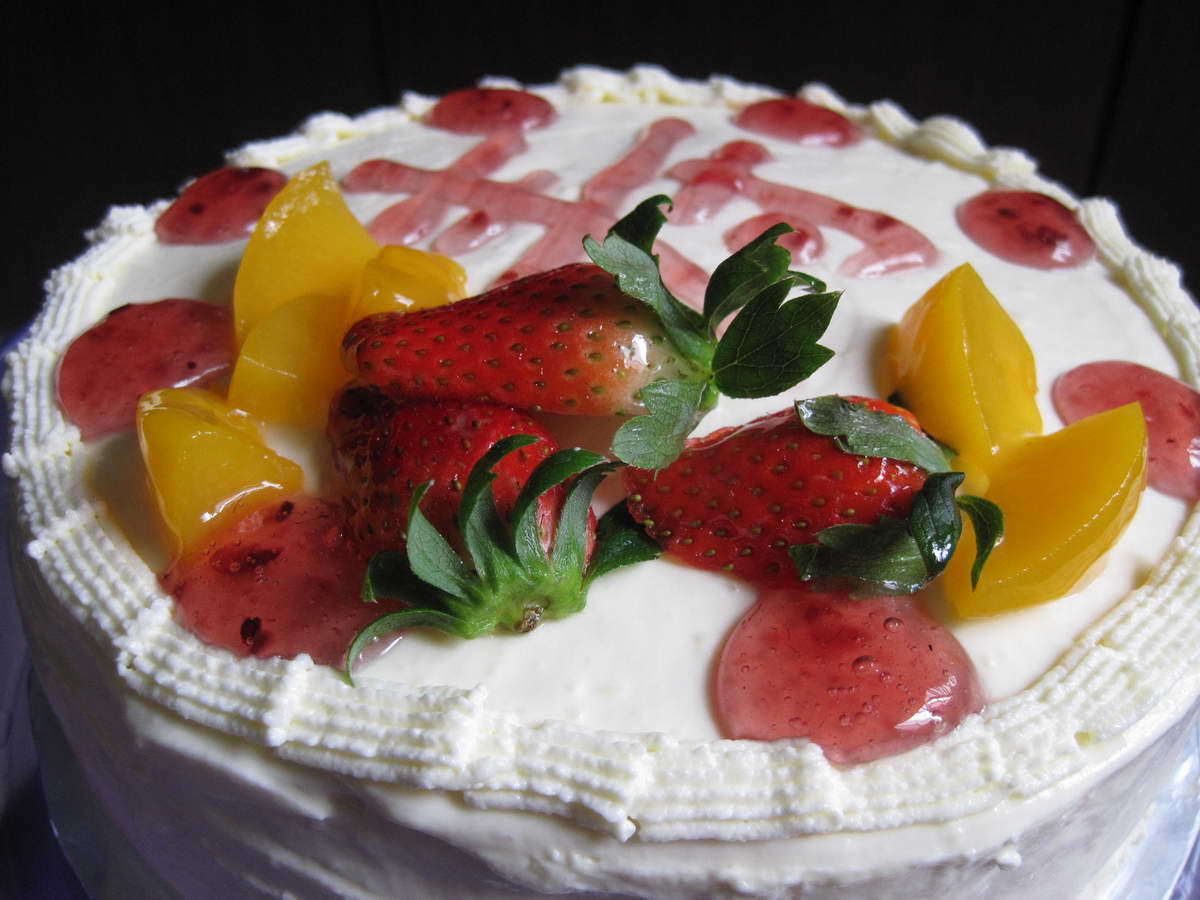
Glazed the fruits with piping gel/jelly (mix 2 part piping gel/jelly with 1 part water) to keep the fruits fresh.
  
For my layered cakes, I never stablise the whipped cream although I've heard and read about this method.  With Singapore's humid weather, my whipped cream always melt on me so I decided to put a stop to melting cream.  There are several ways of stablising whipped cream and I chose the one using gelatin.  I've always used powdered gelatin but since my parents don't eat beef, I had to use gelatin leaves instead.  After mixing in the gelatin mixture, the whipped cream was left in the fridge as I was unable to frost the cake immediately.  When I took it out for the fridge to frost, the whipped cream was too firm to be frosted and I had to thaw it for a few minutes before I could use it.  However, this texture makes piping much easier.

Besides baking Dad a cake, I made agar agar too.

Sometime back, I saw this cendol agar agar in KG's facebook and I asked her for the recipe.  Unfortunately I was too preoccupied to make this and totally forgotten about it.  Then I saw it in Wendy's blog again after several months.  I've always wanted to make this but there were simply no occassion.  Making agar agar with 2 packets of agar agar powder is way too much for my family.  With Dad's birthday celebration, this is the perfect time for me to make this.

I bought cendol for our local supermarket and used thin coconut milk instead.  It's probably me but I try not to feed my family with too much coconut milk.  Despite rinsing the cendol in running water, the agar agar still turned out green.  I'll share about my experience in my next entry. 

We had potluck at my parent's house and here's sharing what my siblings brought (didn't manage to take a picture of what Bro L brought as he was late - he bought Tanjong Rhu Pau yummy!).


I missed out on Bro K's curry fish head too.


Food and companion, we had a great time!  I just love family gatherings!

Back to Dad's longevity cake, I think I whipped my egg whites and folded it well without deflating too much of the egg whites.  This resulted in a tall cake and I was able to slice the cake into 3 layers.  Again, I used my regular chiffon cake base recipe and the cake turned out light and fluffy.

Longevity Cake Recipe
Ingredients
(A)
4 egg yolks
Pinch of salt
30g castor sugar

(B)
60ml corn oil
125ml milk/water

(C)
150g cake flour
1/2 tsp baking powder
*sifted together

(D)
4 egg whites
1/4 tsp cream of tartar
30g sugar

Method
  1. Mix ingredients (A) well with a hand whisk.
  2. Add (B) into yolk mixture, stir well.
  3. Stir (C) into yolk mixture and mix well.
  4. Whip egg whites in a clean mixing bowl until big bubbles are formed. Add in the cream of tartar and whip until white in colour. Add in sugar over 3 times and whip until egg whites is stiff.
  5. Fold in 1/3 of the whites into the yolk mixture using a rubber spatula till incorporated.
  6. Pour the mixture to the remaining egg whites and fold in gently till incorporated.
  7. Pour the batter into a 8" round pan. Bang the pan on the table to get rid of bubbles.
  8. Bake in preheated oven of 170C for 20 minutes.
  9. Turn down the temperature to 160C and bake for 30mins.
  10. Reduce the temperature to 150 deg.C and bake for a further 5 to 10mins to brown the surface.
  11. Remove from the oven and invert the pan. Remove the cake from pan when it's completely cooled.
  12. Cut cooled cake into 3 layers and decorate accordingly.

Thursday, December 16, 2010

Prawn Fritters With Vegetables

When night falls, I have many thoughts in my mind but when I'm sitting in front of the computer, my mind goes blank.  Blogging definitely needs inspiration to keep the entry interesting.  But today, my brain needs some rest.  I've been sleeping for 4 hours daily for the past 2 months as there are simply too many chores.  No, my house is not in tip top condition but the daily marketing, cooking, washing, cleaning, laundry is enough to exhaust me.  And yes, DH is overseas again, I think I only get to see him for a week or two in a month.  With DH away, I'm taking over his chores and I'm completely exhausted by 11pm.  And when I lie on the bed at 1am - 2am (alright, I skived, I did catch some movies on cable/surf the net for some ME TIME), my brain just can't stop working, thinking of the many events that happened and what's going to happen/prepare the next day.  Then , I'm in the state of insomnia again, almost every night.  I do not know what time I fall asleep but I will be awaken by DD3 for feed at least once and by 7am, the whole family is awake.

I initially thought this will be a short and quick entry but it took me almost 2 hours to complete.  Gosh, better stop now and get my butt moving, need to walk the dog.


Prawn Fritters With Vegetable Recipe
Recipe by Anncoo

Ingredients
100g prawns
1 onion - shredded (I used small onions)
1 small Carrot - grated or cut to thin match sticks
some finely cut spring onion or coriander leaves
Some salt and pepper

For the Batter
Ingredients
1 Egg yolk with enough water to make 150ml
3/4 cup Plain flour
1 1/2 tbsp Rice flour

Method


    1. Remove shell and vein from prawns then cut to cubes not too small. Season with some pepper and salt.
    2. Combine the batter ingredients together in a measuring cup and blend into a smooth texture paste.
    3. Add enough oil (its usually sunflower/corn oil in my pantry) for shallow frying with two drops of sesame oil in wok.
    1.  In a medium bowl add prawn cubes, grated carrot, shredded onions and spring onion together.
    1. Then add about 2-3 tbsp of batter (not too thick) into the prawn mixture.
    2. Drop the coated prawn mixture in small portion into hot oil gently with a fork and spoon and shallow fry till golden brown. Dish up and drain oil well.
    3. Serve with mayonnaise or dipping sauce.

    Thursday, December 2, 2010

    Steamed Brownie

    I'm not a brownie lover, especially when we're talking about dense and dry brownies.  But when I saw this in Edith's blog, I knew I must try it as it is steamed!  Yes, you've heard me alright, steamed.

    This is a very simple recipe, no fuss at all.

    It doesn't taste very much like the regular store bought brownie, the texture and taste are entirely different.

    Please pardon the pictures as I used natural lightings but it was a scorching hot day and the rays were too strong.  I should have adjusted the brightness level but I was plain lazy.

    Steamed Brownie
    Source: Magic Steamed Cake
    Recipe seen here

    Ingredients
    (A)
    100g butter
    85g chocolate

    (B)
    170g castor sugar
    3 eggs (large)

    (C)
    20g cocoa powder
    170g plain flour
    1 1/4 tsp double action baking powder
    1/2 tsp baking soda

    (D)
    120g chopped walnut

    Method
    1. Melt chocolate and butter over double boiler till chocolate melted. Set aside.
    2. Whisk egg with sugar till sugar dissolved. Add in cooled chocolate mixture. Mix well.
    3. Sieve C and then it to the chocolate/egg mixture.
    4. Add the walnuts.
    5. Pour into a 8" X 8" square pan (or 22 X 20cm).
    6. Steam on high for 30 mins. Set aside to cool.
    7. Coat with ganache (I omit as I was lazy again)

    Tuesday, November 30, 2010

    Deep Fried Oyster Mushrooms

    Busy is the word to describe me now.  The kids started their 5 weeks long school holiday and I dread the thought of going to the supermarket with them.  And to make matters worse, my fridge konked out on me last week and I went into a frenzy.

    Anyway, to cut things short, here's sharing what I've cooked weeks ago, deep fried oyster mushroom.  I was first introduced to this by my mother.  She visited Malaysia on a 1 day tour and they were brought to a Chinese restaurant for dinner.  When this dish was served, it was wiped up almost instantly, everyone at the table love this!  She bought a few premix packs from them and whenever she cooks this at home, it's always the first dish to disappear from our dinning table.  Yes, it is that good.

    As far as I'm concern, I try to avoid premix as I do not know what goes into the pack.  My kids love this so I try to replicate it at home.  Well, it didn't turn out like my mom's but good enough for my kids.


    Deep Fried Oyster Mushrooms
    Ingredients
    1 punnet oyster mushroom
    6 tbsp rice flour
    6 tbsp corn flour
    1/2 tsp curry powder
    1/2 tsp salt
    pepper to taste
    oil for deep frying

    Method
    1. Clean oyster mushroom and tear length-wise into smaller pieces, do not wash.
    2. Mix rice flour, corn flour, curry powder, salt and pepper in a bowl, mix well.
    3. Heat up your wok or deep-fryer with cooking oil.  When the oil is hot, turn to medium heat.
    4. Coat mushroom with flour mixture and fry till golden brown.
    5. Drain on paper towel and serve immediately.

    Wednesday, November 17, 2010

    Fried Bee Hoon

    DH is basically not an outdoor person, he very much prefers to stay at home or bring the kids to the mall.  I remember my childhood days, when I was young, my father used to bring us to East Coast Park for a swim.  I love family outings and always looking forward to it.

    Now that I have started my own family, I like to them to be near nature, to learn to appreciate the tiny little things in life, and not simply be attracted to electronic games/TV programs.  I'm glad to say that I've successfully "converted" DH to be more outdoor going :-)

    For our weekends, we usually spend our days at the Singapore Zoo or at the beach.  Thanks to DS2's swimming lesson, we now spend most of our afternoon at the beach after his lessons :-)

    DD1 enjoying herself, didn't even realised I was taking a picture of her.  Don't ask me why her hands are up, I asked, she said she just felt good doing that.

    The siblings cooperated and dug a big hole, hoping to fill it up when the tide comes in.

    My dainty little girl, initially whining about the sand in her shoes, but soon got used to it and decided to join in the fun.

    My boring old man, playing iPad at the beach :'-|

    Have to be fair to DH, don't want to do an injustice to him, he "dumped" his iPad and played frisbee with the kids :-) 

    That's my dog's frisbee by the way, we bought a few from Australia when DH was studying there.  We've tried many different types of frisbee, from "branded" (with much rave and great reviews) to simply no brands, and we found that this suit us best.  It is light weight and easy on the grip (for both dog and human).  As it wears and tears relatively fast, I got brother K to buy as many as he could when he visits Australia.  And when we travelled to Australia for our own holiday again, we will wipe up whatever we can find at the store.  Over the years, we bought over 2 dozens (4 more left in our storeroom now).

    Not much food variety at the beach so I always try to prepare some simple food for our lunch/dinner there.  It is usually fried bee hoon as I find it very versatile, adding whatever ingredients I have sitting in my fridge.  Whenever I cook a one pot dish, I prefer to add in more veggies but DH prefers his been hoon "plain".  And I think I've been cooking this too regularly, so much so that DH is requesting that I stop cooking this for a while :P

    Honestly speaking, I don't think there are too much ingredients, I'll very much prefer to add more but I was left with just some cabbage and a small carrot.  Anyway, food is secondary.  Most importantly, the family had a great time bonding together :-)

    Friday, November 12, 2010

    Oatmeal, Currant and Chocolate Chip Cookie

    Exams are finally over and it's time to face reality - results!

    During the exam period, we had been having packed dinner from nearby foodcourts/coffeeshops.  Nope, I didn't take time off to sit down with DD1 to do extra revisions but instead, during my "free" time, I prefer to bring them outdoors instead of being cooped up at home doing extra assessments or exam papers from other schools.  My belief is, they learn through play and with a relaxed mind, they can learn better.  But when the results came back, I start to ponder if my thinking was wrong.  She didn't get lousy results, but just disappointing as after going through the exam papers with her, we know that she can do better.  There were simply too many careless mistakes, and some questions were even taken for granted.  I wonder, if I had spent at least an hour with her on revision, will I see a different result? 

    Nevertheless, I must compliment her for doing fairly well.  I mean, what can I expect, no extra tuition/assessments/exam papers, strictly practice papers from the school (and she did it all by herself with minimal supervision) and she scored 2 Band 1 and 1 Band 2.  Though her same age cousin did so much better, I prefer not to compare.  I do not want her to feel inferior or lousy.  Upon finding out her cousin's results, she wasn't affected, simply couldn't be bothered.  That's my girl, forever in her bo chap (don't care) attitude, never knew what competition is all about.  Some parents may think that if the child feels some peer pressure, he will improve and try to excel.  We appreciate her character though, and I've been inculcating that she doesn't need to win anyone, her opponent is herself.  I hope she gets the message and will do better next year, not in terms of results but at least, lesser careless mistakes.

    Anyway, I haven't been cooking or baking a lot lately.  Thanks to Edith, I was reminded of this cookie which I've bookmarked when I first saw it in Joy of Baking.  I'm basically not a cookie person but if I really have to take my pick, my choice will be a chewy cookie over the crispy version.  And since it was during the exam period, I decided to make some cookies for DD1 to destress (eh... there wasn't any stress in the first place, duh).

    Lovey DD3 wanted to have her picture taken again, but this time round, she requested to feature her pair of hands only.  She does have a mind of her own, without much external influences.  Good or bad?  I don't know yet.

    I used my smallest cookie scoop and made only 1/2 recipe, yields around 50 cookies. Being a non raisin lover, I replaced it with currants.  And like Edith, I added some chocolate chips but reduced the sugar, still find them too sweet.

    This is exactly the kind of cookies I like, crispy on the outside, soft and chewy inside.  However, I gave some to my best pals and their family thought the cookies had turned soft :-|

    DD3 got impatient and wanted to pinch some off the bowl.

    Ingredients
    110g unsalted butter
    100g light brown sugar
    20g caster sugar
    1 large egg
    1/2 tsp vanilla extract (I omit)
    90g all purpose flour
    10g cocoa powder
    1/2 tsp baking soda
    1/2 tsp salt
    1/4 tsp ground cinnamon
    130g rolled oats
    60g currants/raisins
    40g chocolate chips

    Method
    1. Preheat oven to 175 degrees C.
    2. Cream together the softened butter, brown sugar and white sugar until smooth and creamy.
    3. Add the egg and beat well (if you are making full recipe, add egg one at a time).
    4. Add in vanilla extract.
    5. In a separate bowl, mix flour, cocoa powder, baking soda, salt, and ground cinnamon.
    6. Add the flour mixture to the creamed mixture and beat until incorporated.
    7. Stir in the rolled oats, currants and chocolate chips by hand using a wooden spoon.
    8. Using a cookie scoop, drop cookie dough onto the prepared baking tray.
    9. Flatten the cookies slightly and bake the cookies for about 15 - 20 minutes.  The cookies are done when golden brown around the edges but still a little soft in the centers. (The longer the cookies bake the more crispy they will be.) Remove from oven and let the cookies cool a few minutes on the baking sheet before transferring them to a wire rack to finish cooling. These cookies will keep several days at room temperature.

    Thursday, November 4, 2010

    发糕

    Not giving up despite so many "failures" here and here.  The texture is good, just that the 发糕 refused to "huat"/bloom.  I'm still home alone with the kids so no long posting, will just let the pictures do the "talking".


    Sunday, October 31, 2010

    Chicken Butter Rice (Japanese Style)

    During my working days, a few like-minded colleagues (turned friends) visit Japanese restaurants on a regular basis, tucking in on our favourite bento and sushi.  Oh.. those were the days I missed.

    My kids love Japanese food too.  Whenever I declare the kitchen is closed for the day, their usual request is sushi for dinner.  I enjoy eating Japanese food but DH prefers Chinese food.  So if we're eating out as a family, we always end up in this Chinese restaurant at the airport.
      
    I chanced upon this Japanese style butter rice and made it for the kids (seasonings reduced). They love it, except for DD3. You should see how she grimaced at her first bite :P But then again, she will still finish her bowl of rice served.

    DD3 requested to have a picture taken, with her bowl :-)
     
    Chicken Butter Rice
    (recipe adapted from here)
    Serves 2

    Ingredients
    1 chicken breast, cut to bite size
    8 shimeji mushrooms, sliced thinly/chucks
    1 onion, cut into small pieces
    1 tbsp of butter
    1 tbsp of vegetable oil
    2 cups cooked rice

    Sauce

    1/2 tsp grated ginger
    1 tbsp of ketchup
    2 tbsp of soy sauce
    1 tbsp of homemade rice wine (Sake used originally)

    Method
    1. Clean and wash chicken. Pat dry chicken with kitchen towel and cut to bite size pieces (I marinated the chicken with light soy sauce and pepper for 1 hour prior to cooking - optional)
    2. Wash and cut mushrooms into slices.
    3. Mix grated ginger, ketchup, soy sauce and rice wine in a small bowl and set aside.
    4. Heat pan and add oil, fry onion until soft.
    5. Add chicken and cook till chicken is slightly browned.
    6. Add shimeji mushrooms and cook till tender.
    7. Pour in mixed ketchup, soy sauce and rice wine to the pan and mix well. This should take about a minute or 2 to mix everything together. Remove from heat.
    8. Scoop cooked rice into a big mixing bowl while the rice is still hot.  Add in butter and mix till the butter has melted completely.
    9. Add cooked chicken and mushrooms from the frying pan into the mixing bowl. Mix everything together.
    10. Serve immediately.

    Friday, October 29, 2010

    Clear Water Cake (Sponge Cake) 清水蛋糕

    I've not been baking for a long time and with an itching pair of hands, I decided to try Angel's Clear Water Cake which I have bookmarked a year ago. 

    But why "clear water" when there is no water used in the first place? To quote the originator, "这个蛋糕就如名字一样,外形清清澈澈简简单单,可是里面却不简单哦,超细腻的组织,超柔软的口感,入口即化".

    I didn't bother to level the top of the batter and ended up with uneven looking cakes.  Also, after baking for 12 mins, the top didn't brown although the cake was cooked so I gave it another 2 minutes, hoping to get a nice brown.  Not much luck here.

    Instead of using muffin cups, I used mini cupcake cases as I wanted it to be popped into the mouth, just like that, no bites = no mess.

    And it's just right for my son to pop the whole cake into his mouth :)

    This has a light and fluffy texture, definitely a keeper!

    Clear Water Cake 清水蛋糕
    (Recipe originally from here and seen here)

    Ingredients
    (A)
    3 egg yolks 蛋黄
    1 whole egg 全蛋
    50g corn oil 粟米油

    (B)
    50g low protein flour (I used plain flour as I ran out of cake flour)

    (C)
    3 egg whites 蛋白

    (D)
    40g castor sugar 细砂糖
    1g salt 盐 (I didn't weigh, just added about 1/4 tsp)

    Method 做法
    1. Beat (A) till well mixed with an egg beater. 用打蛋器打匀(A)。
    2. Sift in (B), mix well. 筛入(B)拌匀.
    3. Whisk (C) till frothy, add (D) and beat till stiff peak. 把(C)打至粗泡,加入(D)打至干性发泡。
    4. Fold in the egg white mixture to egg yolk mixture in 3 additions, mix till well combined. Scope the batter into paper cups till 60% full. 蛋白霜分3次和蛋黄糊拌匀,用小勺装进纸杯至6分满。
    5. Bake in preheated oven at 150C for about 18-20mins. 烤箱预热150度,烤18-20分钟左右。(I baked mine for 14 mins as my casings are really small)