Wednesday, October 27, 2010

Braised Chicken with Miso Paste

Many happenings at home and with DH overseas, I'm struggling alone so I'm just going to post another quick entry here, just to show my presence.

This is another recipe with miso paste and my kids love it.  Thanks Anncoo for sharing this great recipe!  I've reduced the seasonings slightly as my cooking is relatively bland.

Braised Chicken with Miso Paste
Ingredients
500g Chicken Thigh - cut to pieces
250g Potatoes - remove skin and cut to pieces
1/2 tbsp Dark soy sauce
1 tbsp Miso paste
1/2 tbsp Garlic - chopped
1/2 tsp Sugar
125 - 150ml Water (estimated)

Seasonings
1/4 tsp sesame oil
1/4 tsp salt
1/4 tsp pepper
1/2 tbsp Dark soy sauce

Method
  1. Clean and wash chicken (I like mine with skin removed). Pat dry chicken with kitchen towel and cut to pieces. Marinate chicken with seasonings for 1-2 hours.
  2. Heat enough oil in wok, add chopped garlic and miso paste and fry for a while till aromatic.
  3. Add in chicken pieces with another 1/2 tbsp dark soy sauce and sugar, continue to stir fry chicken well.
  4. Lastly add in cut potatoes, mix well with the chicken, add in just enough water to cover the chicken. Bring water to boil and cover with lid, lower heat and simmer for about 20 mins or potatoes soften.
  5. Add a little more water when the sauce dries up a little.
  6. Lastly add corn flour with water as thickening. (optional - I omit).
  7. Serve hot with rice.

Thursday, October 14, 2010

Papaya Popsicles


I've asked this question before, "What do you do with overripe papayas?"  I've made papaya milkshake with them and now I've converted them into popsicles, inspiration came from my watermelon popsicles ;-)
 
I was trying to snap a picture of the popsicles but DD3 just couldn't wait any longer.
 
Quick and easy, yet very healthy treat for the family!
 
And if you are plain lazy like me, just freeze the whole cut papaya into the freezer ;-)
 
Papaya Popsicles
Ingredients
1/2 large papaya/paw paw chucks
1 lime juice (I find it quite mild, can use up to 2 limes if you want)

Method
  1. Cut the papaya in chunks with skin and seeds removed.
  2. In a blender, combine the papaya chunks and lime juice. Blend the mixture till the mixture turns into liquid.
  3. Pour the mixture into popsicles mould and freeze for at least 8 hours or overnight.
  4. Run the molds under warm water for 30 seconds to release the pops. Enjoy!

Monday, October 11, 2010

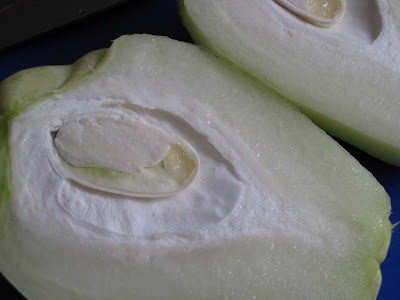
Chayote and Fresh Chinese Yam Soup

Just a quick update on soup using chayote and chinese yam.

I have only 1 large chayote so I just make do with it but reduced water accordingly, else the soup will be too bland.  This is a milky soup as chinese yam is used, supposingly to relieve cough and colds.

Another mild sweet soup, we like it.

Chayote and Fresh Chinese Yam Soup
Ingredients
300g pork ribs/lean meat
1 - 2 chayotes (佛手瓜 fo shou gua /合掌瓜 hup jeung gwa)
1 fresh chinese yam (淮山 huai shan /山药 shan yao)
1200ml water
Salt to taste

Method
  1. Wash and cut chayotes and chinese yam into cubes.
  2. Blanch pork ribs/lean meat.
  3. Bring water to boil and add all ingredients in a pot. Using medium fire, bring water to boil again and cook for 30 minutes, reduce to small flame and simmer for 2 hours.
  4. Add salt to taste before serving.

Friday, October 8, 2010

Piano Cake

This is a jump queue post.

My son's birthday was back in August but I didn't have time to blog about it.  Decide to jump the queue before the next birthday arrives (my mom's in November).

DD1 and DS2 started taking piano lessons back in June this year.  I must say DS2 did not show as much interest as his sister since he hasn't been practising.  Probably because of his age?  Or he just doesn't have the passion?  But the interesting part is, he asked me to bake him a piano cake for his birthday.

I remember seeing 2 piano cakes, here and here, both very different styles.  I had wanted to adapt HHB's keyboard cake but I don't have a cake box big enough to accommodate a rectangle cake.  And with Wendy's, though I have a square cake pan, it has not been used to bake a chiffon cake (I only use chiffon cake base for my layer cakes) so I was worried the cake may get stuck to the bottom of the pan.  Googled for piano cake ideas and all of them are baked in squares or rectangles, mostly covered with fondant (which needs a dense cake to support).  I give up.  Decided to just bake a 8" round cake and decide on the decoration later as I've communicated with DS2 I can't commit but I'll try my best. He gave me a few other options, a ball cake, a gummy bear cake, or just a cake with his name on it and the words "Happy Birthday".

I did my sketch on a recycled paper, measuring out the black and white keys in a 8" cake pan.  I forgot 8" is too big for my family so I had to reduce to a 7" instead.  After this draft was done, DD3 decided to help me with some colouring.

I melted some chocolate for the black keys but when I was removing them from the parchment paper, they cracked.  I have contigency plan of course, Kit Kat!  That saved the cake :-)

I used dairy whipping cream and again, it's melting on me :'(

I left the cake on the table while I go get the knife.  DD3 couldn't wait and decided to poke her little finger into the cream.  If DS2 were to see this, a war is inevitable.

I first saw this rainbow cake at What's For Dessert Today, adapted from Rumah Manis, and then at Wendy's.  I thought the kids will be thrilled to see something colourful but I was wrong.  They didn't go "wow" after seeing the sliced cake.  To them, it was just another plain cake.

Basic Chiffon Cake
Ingredients
3 egg yolks
20g castor sugar

60ml corn oil
pinch of salt
100ml water

110g cake flour
1/3 baking powder

3 egg whites
1/3 tsp cream of tartar
30g castor sugar

Method
  1. In a bowl, using hand whisk, whisk yolks and sugar till sugar dissolves.
  2. Add oil and salt, whisk and add water. Stir well.
  3. Fold in sifted flour and baking powder, mix well.
  4. In another bowl, using an electric mixer, beat till the whites are frothy. Add in Cream of Tartar and beat till soft peaks.
  5. Add in sugar gradually and beat till stiff peaks.
  6. Fold in 1/3 of the whites into the yolk mixture using a rubber spatula till incorporated.
  7. Pour the mixture to the remaining egg whites and fold in gently till incorporated.
  8. Pour the batter into 7" round pan. Bang the pan on the table to get rid of bubbles.
  9. Bake at pre-heated oven of 170 deg.C for 20 mins.
  10. Turn down the temperature to 160 deg.C and bake for another 20 - 25 mins.
  11. Reduce the temperature to 140 deg.C and bake for a further 5 - 10 mins to brown the surface.
  12. Remove from the oven and invert the pan. Remove the cake from pan when it's completely cooled.

Friday, October 1, 2010

Piglets (豬仔餅)

I need to apologise to all my snow skin mooncake recipients.  SL shared that her mother will not give away snowskin moonies in white as it deem inauspicious.  My intention was good (all natural with no artificial flavours and colourings, remember?) but it didn't occur to me to think about it as ill boding.  I hope none of my recipients are offended.

I promise this will be my last post on moonies.  I know, Mid-Autumn Festival was like 1.5 weeks ago but here I am, still blogging about it.  In fact, what you read here are all cooked/baked several weeks or even months back.  Take for example my son's birthday (which falls in Aug), I've not posted his cake yet (and that is NOT the oldest backlog).

Back to the piglets (豬仔餅).  Anncoo has a similar recipe but the standing time was only 20 mins.  I decided to try her method and made a batch of Piglets but I find them too sweet, probably because I brushed them with a layer of sugar syrup instead of eggwash.  And the shape of these piggies, I thought they looked more like alligators :P

All the piglets were stuffed with some lotus paste as I was trying to clear off the balance in my fridge. 

In my opinion, I think the fishes look so much better.

Traditional Baked Mooncakes
Yield : 12 piglet mooncakes

Ingredients
(A)
200g Hong Kong Flour

(B)
120g Golden syrup/Sugar syrup
60g Peanut oil (I used sunflower oil)
1/4 tsp Alkaline water
* mix together

(C)
120g White Lotus Paste
Some melon seeds, toasted (optional)

(D)
1 tbsp sugar syrup
1 tsp water
** mix together

Method
  1. Toast melon seeds and leave to cool.
  2. Mix melon seeds with lotus paste and divide into portions of 10g each.
  3. Sift hong kong flour into a mixing bowl.
  4. Pour in (B), combine well to get a smooth dough in one direction.
  5. Cover with cloth, let it stand for 20 minutes.
  6. Divide dough to portions of 30g each portion.
  7. Lightly flour your hands, wrap lotus paste with dough, roll into a ball.
  8. Lightly flour the mould.
  9. Place mooncake in mould, flatten, dislodge the mooncake.
  10. Bake in a preheated oven at 180°C for 10 mins, remove and brush with diluted sugar syrup.  Continue to bake for another 15 mins at 180°C.
  11. Remove mooncakes from oven and leave to cool.
  12. Store for 3 days before serving.

Monday, September 27, 2010

Snow Skin Mooncakes

It has been more than a week since I last visited my blog. Didn't even know time passed so fast!
 
Mooncake making took up quite a bit of my time as I bought 2kg of paste this year and made 3 batches baked mooncakes (1 batch of piglets) and 3 batches snow skin mooncakes.  Now I'm not sure if I'm going to make any more moonies again next year.  Anyway, I've only enjoyed the process of making them, and not the eating process as they are so so sweet.
 
My initial plan was to blend some fresh pandan juice for the skin but I didn't have enough time (it was another mad rush this year) so I left the skin all natural ie no colours or artificial flavours added.  My friends call me a "freak" as I don't usually feed my kids with colourings and artificial flavours, especially candies/ice creams.  Of course, there are some exceptional cases ;-) 

I made these  using my jelly moulds but the imprint aint too obvious. This box went to DD1's ballet teacher, though she's not a mooncake eater like me, I've always wanted to give her something, just to show my appreciation.

When I was young, I wasn't exposed to ballet and I've always thought that ballet is for vain girls.  Through some forums and own research, I found out that the benefits of ballet includes self discipline, self confidence, develops motor skills, good posture and the list goes on.  I'm glad my girl is enjoying her lessons with MB, a young and pretty lady who's strict in her coaching.  She practises her ballet almost daily, so much so that it gets onto my nerves and I had to ask her to stop dancing!  Now my 2.5 yo dances along with her sister at home and she can even remember some of the steps her sister taught her.  Looks like another ballerina is in the making ;-)

I used the same trusted recipe but reduced sugar slightly.  The texture wasn't compromised and they are still soft when fresh from the fridge, no thawing needed.

Snow-Skin Mooncakes
Yields 18 small mooncakes

Ingredients
(A)
95g Fried Glutinous Rice Flour/Gao Fen
100g Icing Sugar
*sifted together

(B)
155ml cold water

(C)
15g Shortening

(D)
450g lotus paste
Some melon seeds, toasted (optional)

Method
  1. Toast melon seeds and leave to cool.
  2. Mix melon seeds with lotus paste and divide into portions of 25g each.
  3. Mix Ingredients A and Ingredients B to form dough.
  4. Rub in shortening till get a smooth dough.
  5. Sprinkle some fried glutinous rice flour on working table.
  6. Divide dough to portions of 20g each portion.
  7. Wrap lotus paste with dough, roll into a ball.
  8. Lightly flour the mould.
  9. Place mooncake in mould , flatten, dislodge the mooncake.
  10. Chill in fridge before serving.

Friday, September 17, 2010

Baked Mooncakes (vegetarian)

SL helped me to buy the paste for mooncake making again (thanks dear!).  I told myself I need to make it earlier this year as I was so so late last year.

Last year, I made 2 flavours, lotus paste and matcha/green tea (both are "less sweet" version).  This year, I promised my Dad to make him mooncakes with durian paste.

The mooncake mould I have comes with 3 removable plates and that made it so much easier for me differentiate the flavours.

I have no plans to buy the matcha/green tea paste this year but DH specifically asked for it.  Like me, we don't much appreciate eating mooncake but since he asked for it, oh well....

The round ones were made yesterday and I baked another batch again this morning using my square mould.  Again, this comes with 3 removable plates.

I think I did a better job this year, shaping the paste one day in advance instead of doing everything on the same day.  Oh boy, that was a mad rush.  My mom asked for vegetarian mooncakes so I substituted egg wash with diluted sugar syrup.

The round mooncakes spreaded a little while baking and I suspect it was because I let the dough stand for more than 2 hours.  So in my 2nd attempt today, I only let it stand for 1 hour 45 mins.  It took me 30 mins to complete wrapping all 18 mooncakes with some disturbance from DD1.

Traditional Baked Mooncakes
Yield : 17 - 18 small mooncakes

Ingredients
(A)
200g Hong Kong Flour

(B)
120g Golden syrup/Sugar syrup
60g Peanut oil (I used sunflower oil)
1/4 tsp Alkaline water
* mix together

(C)
400g White Lotus Paste
Some melon seeds, toasted (optional)

(D)
1 tbsp sugar syrup
1 tsp water
** mix together

Method
  1. Toast melon seeds and leave to cool.
  2. Mix melon seeds with lotus paste and divide into portions of 25g each.
  3. Sift hong kong flour into a mixing bowl.
  4. Pour in (B), combine well to get a smooth dough in one direction.
  5. Cover with cloth, let it stand for 1 hour 45 minutes.
  6. Divide dough to portions of 20g each portion.
  7. Lightly flour your hands, wrap lotus paste with dough, roll into a ball.
  8. Lightly flour the mould.
  9. Place mooncake in mould, flatten, dislodge the mooncake.
  10. Bake in a preheated oven at 180°C for 15 mins, remove.
  11. Set aside for 30 mins, brush with diluted sugar syrup.
  12. Return mooncakes to oven, bake for another 15 - 20 mins at 180°C.
  13. Store for 3 days before serving.