Friday, January 14, 2011

Aspiring Bakers #3: CNY Cookies (2011) - Checkerboard Cookies (JOB)

There were no intentions to make any checkerboard cookies until Aunty A called me last Sunday.  I was brainstorming with her over the phone on how to get the checker effect but she doesn't quite understand me. Actually I wasn't quite sure of myself and since I wasn't planning to cook dinner, I decided to drop by her place to see if we can get it right.  After spending a good half an hour in her house, I left without seeing the final outcome as the dough was resting in the freezer, waiting to be sliced, and I had to go pack dinner.  Aunty A sent me an sms to let me know that it turned out pretty alright.  Now my hands are itching to try making some :P

I googled online and found this recipe by Joy of Baking.  There were no step-by-step pictures to show how this was done so I googled more and found this.  Paul attempted the same recipe and did it so beautifully.  Yes, I've got the steps almost correct at Aunty A's house except that I sliced the stack breadth-wise instead.  Silly me!

Though it looks difficult, it is actually not, just slightly time consuming as you need to chill the dough several times.  I like how these turn out and although I'm not a cookie person, I enjoy munching on them.  My kids love these too and kept asking for more :-)

I am submitting this to Aspiring Bakers # 3: My Favorite CNY Cookie (Jan 2011) hosted by j3ss kitch3n.

Adapted from Joy of Baking
Source: Baggett, Nancy. The International Chocolate Cookbook. Stewart, Tabori & Chang. New York: 1991.

For step-by-step pictures, please refer to Paul's blog here.

Ingredients
1/3 cup (45 grams) hazelnuts (I replaced with almonds)
2 tablespoons (15 grams) unsweetened Cocoa Powder
2 1/2 cups (325 grams) all purpose flour
1/8 teaspoon salt
1 cup (227 grams) unsalted butter, room temperature
3/4 cup (150 grams) granulated white sugar (I used 100g)
1 large egg
1 1/2 teaspoons pure vanilla extract (I omit)
1 1/2 teaspoons orange zest (I used lemon zest instead)

Method
  1. Place the almonds and cocoa powder in a food processor and process until the almonds are finely ground. (I didn't bother to toast them)
  2. In a small bowl whisk together the flour and salt.
  3. In bowl of your electric mixer (or with a hand mixer), beat the butter and sugar until light and fluffy (about 2 to 3 minutes). Add the egg, vanilla extract and lemon zest and beat until well blended. Add the flour mixture and beat just until incorporated.
  4. Divide the dough into 2 portions (mine was 350g and  400g) and add the cocoa/almond mixture to the larger dough. Set aside.
  5. Lay out two large sheets of parchment paper (about 10 x 12 inch) (25 x 30 cm) and on one sheet of parchment roll out the white dough into a 6 1/2 inch by 10 1/2 inch (22 x 26 cm) rectangle, making sure both sides of the dough are smooth. Wrap dough and place on a baking sheet in the freezer for about 15 minutes or until dough is firm.
  6. Meanwhile, take the chocolate dough and remove 1/2 cup (used later for wrapping the checkerboard log) and cover with plastic wrap. Set aside. On the second sheet of parchment roll out the remaining chocolate dough into a 6 1/2 inch by 10 1/2 inch (22 x 26 cm) rectangle, making sure both sides of the dough are smooth. Wrap dough and place on a baking sheet in the freezer for about 15 minutes or until dough is firm.
  7. When both the white and chocolate dough are firm, remove from freezer and lay the white dough on a cutting board, removing the parchment paper. Lightly brush the top of the white dough with a little water (this helps the layers to stick together). Remove the parchment paper from the chocolate dough and place it evenly on top of the white dough. Trim the edges of the two doughs so the rectangle now measures 6 inches by 10 inches (21 x 25 cm). (Take the chocolate dough trimmings and add to the 1/2 cup of reserved chocolate dough.) Lengthwise cut the rectangle into thirds (3 - 2 inch by 10 inch stripes) (5 x 25 cm). Place one strip on a piece of plastic wrap. Brush the top of the dough with water and place the second strip on top of the first (alternate colors so you have white, black, white, black pattern). Brush the top of the second layer with water and stack the third layer. Press down lightly on the top of the dough and then wrap and freeze for 15 minutes, or until firm.
  8. When firm, remove from freezer and unwrap, placing the dough on a cutting board. Using a sharp long knife, cut the layers lengthwise into 1/2 inch (1 cm) wide and 10 inch (25 cm) long strips. (You will end up with 4 strips). Stack the layers, turning every other strip so top faces down and bottom faces up, to produce the checkerboard effect. Rewrap stack and place in freezer again to firm up.
  9. Meanwhile, take the reserved chocolate trimmings and 1/2 cup of chocolate dough and roll out on a piece of parchment paper into approximately 9 1/2 x 10 1/2 inch (24 x 26.25 cm) rectangle, making sure the dough is smooth. Cover and refrigerate until slightly firm.
  10. Remove stack of checkerboard dough from freezer and place in center of chocolate dough. Wrap the chocolate dough around the checkerboard layers until you have a smooth surface that encloses the checkerboard design. Wrap in plastic and freeze until firm. Can freeze dough for up to a month.
  11. Preheat oven to 350 degrees F (177 degrees C) and place rack in center of oven. Line a baking sheet with parchment paper. Remove dough from freezer and place on a cutting board. With a sharp knife cut the block of dough into 1/4 inch thick slices. Place on prepared baking sheet spacing about 1 inch (2.5 cm) apart. Bake for about 5-8 minutes or until cookies just start to brown around the edges. Remove from oven and place on wire rack to cool.
  12. Baked cookies can be stored in an airtight container up to one week.

Monday, January 10, 2011

Chinese Yam Chicken Soup 淮山鸡汤

I love Chinese Yam (淮山 huai shan /山药 shan yao) and is actively looking for new soup recipes to try out.  After I found this recipe by Food 4 Tots, I've been cooking this fairly often as my kids love this soup very much.

The chinese yam sold in the supermarket nearby weigh 500g and above.  I do not want to use half of it and keep the balance so I always throw in the whole lot into the pot.

PS: I hate taking soup pictures as they are always so boring.

Chinese Yam Chicken Soup (淮山鸡汤)
Ingredients
500g chicken meat/bones
500g fresh huai shan(淮山 huai shan /山药 shan yao), peeled and cut into chunks
2 - 3 large carrots
100g yu zhu (玉竹)
2 tbsp gou zi (枸子)
20 - 30 red dates (I added in these dates to increase the sweetness of the soup)
1.5 - 2 litres water

Seasonings
2 tbsp rice wine (sometimes I use homemade ginger wine 姜酒)
Salt to taste

Method
  1. Remove skin of carrots and cut into smaller pieces.
  2. Rinse red dates and yu zhu, soak in water for 5 - 10 mins or till soft.
  3. Blanch chicken meat/bones.
  4. Bring water to boil and add all ingredients (except wolfberries) in a pot. Using medium fire, bring water to boil again and cook for 10 - 15 minutes, reduce to small flame and simmer for 2 hours. 
  5. Add in the wolfberries and let it brew in low fire for another 5 - 10 mins.
  6. Add salt and rice/ginger wine to taste before serving. 

Thursday, January 6, 2011

Homemade Dark Chicken Stock

When there are too much leftover meat from a party/gathering, what do you do with them?  For me, I like to use them to make dark chicken stock, best if you have the roasting juices too, yummy!

All you have to do is just cook the leftover meat with some vegetables (I like to add in some tomatoes too but I ran out of it that day).

Put all ingredients into a pot and fill it up with water (depending on how much leftover you have, I usually add 1.5 litres to 2 litres) and add 1/2 -  1 tablespoon of herbs (I like to use mixed herbs).  Bring to boil and cook for 10 minutes.

Lower heat and simmer for another 1.5 hours (or more).  Add salt and pepper to taste.

Strain the stock and pour it back into the pot.  Bring the stock back to a boil, add leftover shredded/sliced meat and more vegetables if you want.  Pour over cooked instant noodle and serve immediately (they asked for this instead of the usual macaroni).

Note:
If you are freezing the stock, the fat in the stock will float to the top and harden.  Use a metal spoon to scrap off the fats.


Tuesday, January 4, 2011

Cendol Agar Agar

The first time I saw these beautiful cendol agar agar was in Facebook by an ex-colleague, KG.  She's the pioneer of our nursing mother, the one who suggested to our Human Resource to start a Lactation/Nursing Room for breastfeeding mothers.  I'm thankful to her for her initiative as without her, I probably wouldn't be able to survive my 5 years of breastfeeding back then.  Thanks KG!

I sent her a private message asking for the recipe and she was really kind to go dig out from her old files and emailed me.  I procrastinated making this dessert as my family will not be able to finish up the whole lot of agar agar.  Even with family gatherings/birthdays, I was lazy and didn't want to spend too much time on desserts as the cake alone is already a killer.

I was reminded of this agar agar again when I saw it in Wendy's blog.  It is so beautiful, who can ever resist such an appetising dessert?  Definitely not me.


Whenever there's a potluck in my maiden family, I'm usually the one bringing dessert as I'm the worst cook in the family.  And to pack food from outside is a no-no for me as I do not want to commit on something I'm not sure if I can fulfil.  To play safe, my contribution is usually dessert, quick and easy :P

This time round, with Dad's birthday celebration on a Saturday, I had more time to prepare as Friday is my day off (we go over to my inlaws for dinner yippee!!).  After running through the schedule in my mind while I was on the bed on Thursday night, I suppose I might be able to make an agar agar in addition to the longevity cake I have in mind.


The steps to make this is quite long-winded.  When I first received the email attachment from KG, I was also partially deterred by the method, seems like a lot of work.  But when I actually made this, it wasn't that tedious or difficult after all.  My kids love this except for DD3, she only likes the cendol layer but not the gula melaka agar agar. 

The colour of the cendol layer sucks!  I've rinsed the store-bought cendol several times before use but still, the colour runs.   Imagine the amount of colourings we are feeding ourselves.

I've adapted Wendy's recipe but did some modifications as I was using packet coconut milk (trim version).  I was brought up to regard coconut milk as unhealthy and I try to refrain from cooking/baking with it.  But if you want something really delicious, go with coconut cream.

Cendol Layer
Ingredients
(A)
250ml water
13g/1.5 Tbsp agar-agar powder

(B)
550ml water
170gm sugar

(C)
200ml coconut milk
pinch of salt
30gm corn starch

(D)
600gm cendol
(originally 500g but the store bought comes in 300g each pack)

Method
  1. Mix agar powder with 250ml water, set aside.
  2. Mix cornstarch, salt and coconut milk together, set aside.
  3. Bring 550ml water and sugar to a boil. When solution has come to a boil, pour in agar mixture.
  4. Bring to a boil again, lower heat and pour in cornstarch mixture, stirring all the while.
  5. On medium heat , bring back to a boil. Remove from heat and put in drained cendol. Mix well.
  6. Pour into a 10 inch square pan. (I used a 8" square and a 6" round pan)
  7. Leave it aside to harden slightly while you prepare the gula melaka layer.
Gula Melaka Layer
Ingredients
(A)
250ml water
13g/1.5 Tbsp agar-agar powder

(B)
180gm gula melaka/palm sugar
550ml water
2 blades pandan, shredded and knotted

(C)
200ml coconut milk
pinch of salt
*mix together

Method
  1. Mix agar powder with 250ml water, set aside.
  2. Bring 550ml water, gula melaka/palm sugar and pandan knot to a boil and simmer until palm sugar has totally dissolved.
  3. Sieve solution and pour it back into the pot.
  4. Pour in agar mixture, bring to a boil again.
  5. Lower heat and pour in coconut milk stirring all the while. When there are small bubbles on the side of the pot, remove pot from heat.
  6. Test cendol layer by touching surface. It should have slightly cooled and developed a film on top that does not stick to your fingers, but should be wobbly. Pour in gula melaka layer slowly and let it set and cool down.
  7. Chill in fridge before cutting.
Note:
If your cendol layer has totally hardened, scar surface with a fork before pouring in brown layer.

Friday, December 31, 2010

Dad's Birthday cum Christmas Party

I've totally, completely forgotten about Dad's birthday this year.  I don't know what I'm busy with since I haven't been cooking nor baking much, but I just seem to be busier.

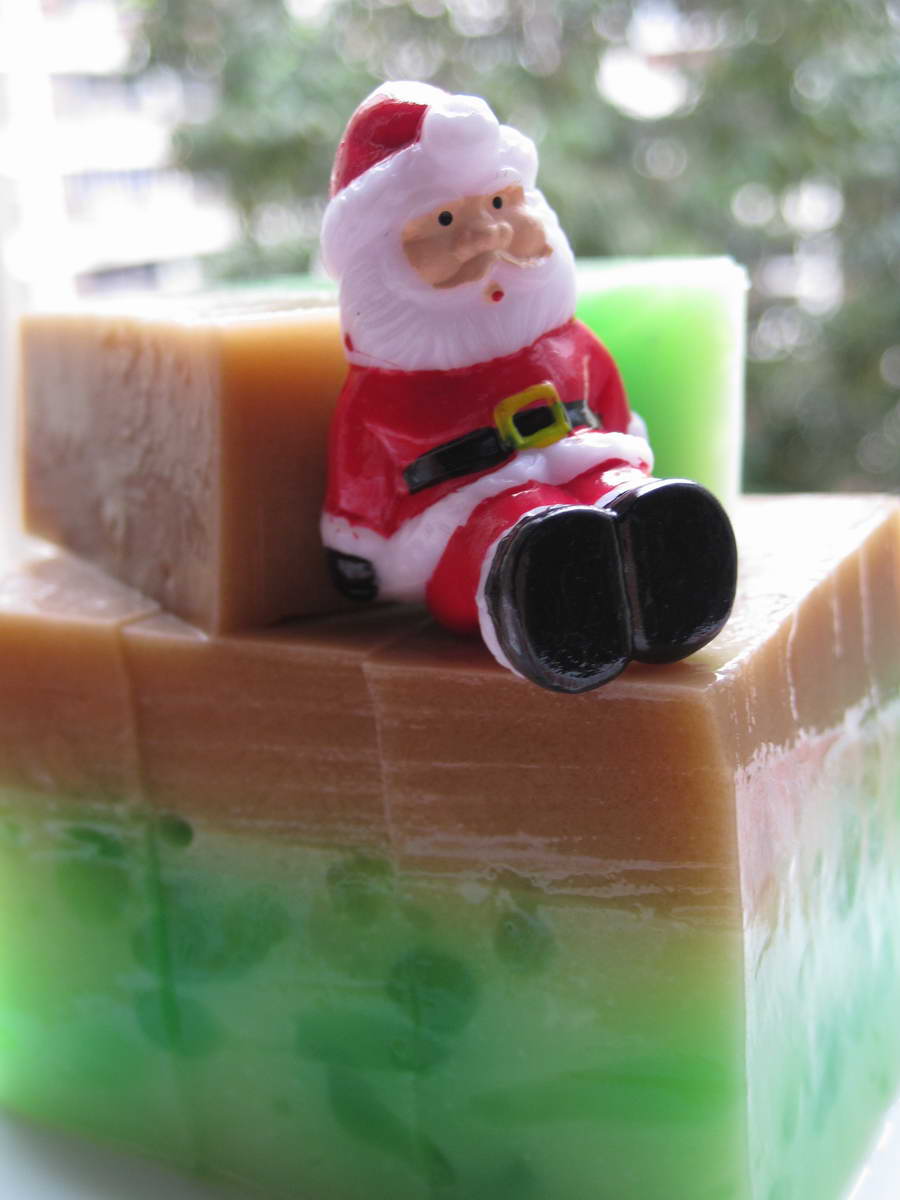
Last December, I baked Dad a Santa Claus cake and I was planning to bake him a log cake this year.  But after some thoughts, I decided against it and decided to bake him a proper birthday cake.

His birthday celebration was initially planned on Boxing Day but was brought forward to Christmas Day instead.  I had promised to meet up with AH for a gathering in her house on Christmas Eve, with some ex-colleagues whom I've not met for years.  Although she's staying at the other end of Singapore and to travel there by public transport with 3 kids, I think it will probably take me 2 hours from point to point.  I'm so looking forward to this gathering as I've not met them since I left the company in Feb 2008.  But with the change in date, I couldn't make it for the gathering. (Sorry AH, you organise another one next year, I'll try to make it, I promise).

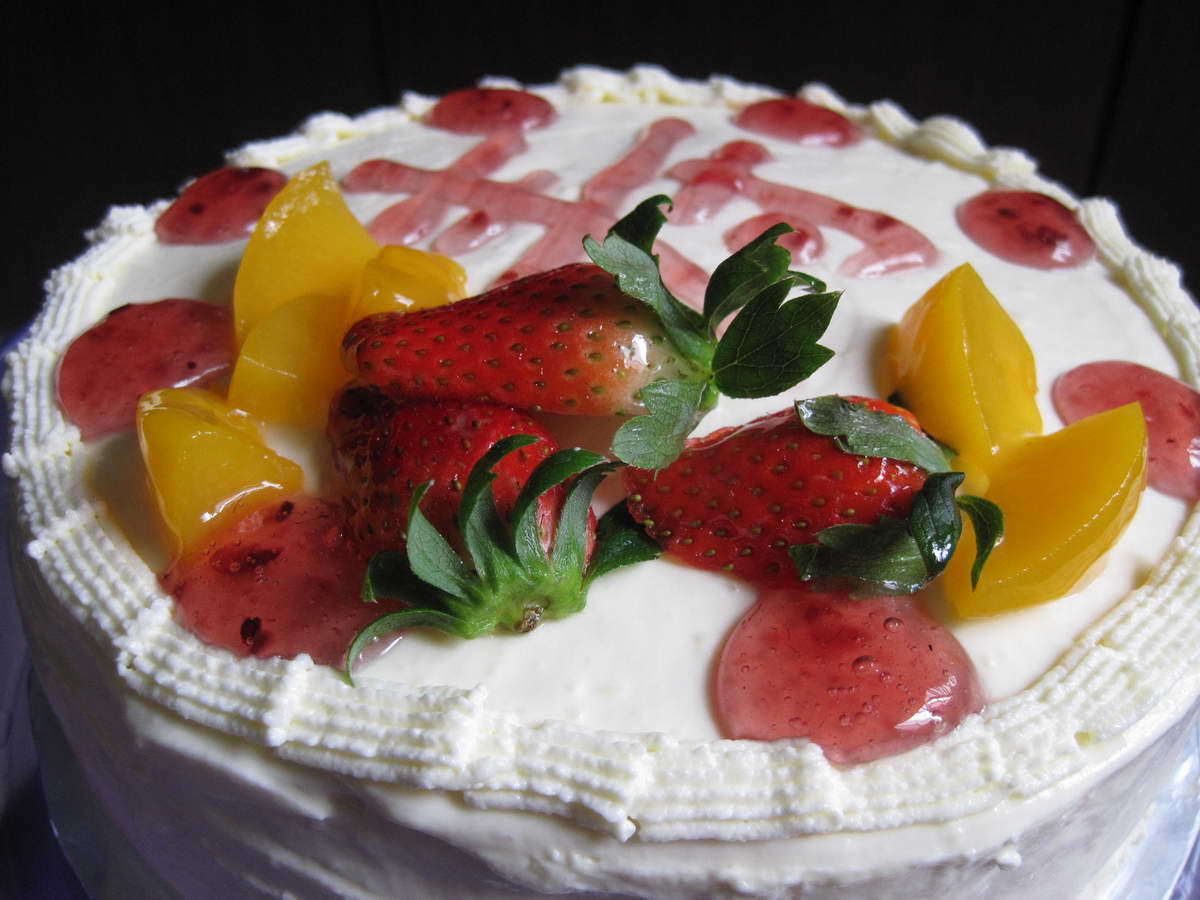
After googling online for some cake ideas, I decided to bake him a longevity cake and found this design that I think I might be able to complete.  Though it doesn't look as presentable, I think it is still acceptable, at least for a home baked cake.

I didn't want to buy any colour paste just for this so I added some mixed berries jam, which I got the idea from Bakertan.  The colour didn't turn out too vibrant, but I think it is still acceptable.

Glazed the fruits with piping gel/jelly (mix 2 part piping gel/jelly with 1 part water) to keep the fruits fresh.
  
For my layered cakes, I never stablise the whipped cream although I've heard and read about this method.  With Singapore's humid weather, my whipped cream always melt on me so I decided to put a stop to melting cream.  There are several ways of stablising whipped cream and I chose the one using gelatin.  I've always used powdered gelatin but since my parents don't eat beef, I had to use gelatin leaves instead.  After mixing in the gelatin mixture, the whipped cream was left in the fridge as I was unable to frost the cake immediately.  When I took it out for the fridge to frost, the whipped cream was too firm to be frosted and I had to thaw it for a few minutes before I could use it.  However, this texture makes piping much easier.

Besides baking Dad a cake, I made agar agar too.

Sometime back, I saw this cendol agar agar in KG's facebook and I asked her for the recipe.  Unfortunately I was too preoccupied to make this and totally forgotten about it.  Then I saw it in Wendy's blog again after several months.  I've always wanted to make this but there were simply no occassion.  Making agar agar with 2 packets of agar agar powder is way too much for my family.  With Dad's birthday celebration, this is the perfect time for me to make this.

I bought cendol for our local supermarket and used thin coconut milk instead.  It's probably me but I try not to feed my family with too much coconut milk.  Despite rinsing the cendol in running water, the agar agar still turned out green.  I'll share about my experience in my next entry. 

We had potluck at my parent's house and here's sharing what my siblings brought (didn't manage to take a picture of what Bro L brought as he was late - he bought Tanjong Rhu Pau yummy!).


I missed out on Bro K's curry fish head too.


Food and companion, we had a great time!  I just love family gatherings!

Back to Dad's longevity cake, I think I whipped my egg whites and folded it well without deflating too much of the egg whites.  This resulted in a tall cake and I was able to slice the cake into 3 layers.  Again, I used my regular chiffon cake base recipe and the cake turned out light and fluffy.

Longevity Cake Recipe
Ingredients
(A)
4 egg yolks
Pinch of salt
30g castor sugar

(B)
60ml corn oil
125ml milk/water

(C)
150g cake flour
1/2 tsp baking powder
*sifted together

(D)
4 egg whites
1/4 tsp cream of tartar
30g sugar

Method
  1. Mix ingredients (A) well with a hand whisk.
  2. Add (B) into yolk mixture, stir well.
  3. Stir (C) into yolk mixture and mix well.
  4. Whip egg whites in a clean mixing bowl until big bubbles are formed. Add in the cream of tartar and whip until white in colour. Add in sugar over 3 times and whip until egg whites is stiff.
  5. Fold in 1/3 of the whites into the yolk mixture using a rubber spatula till incorporated.
  6. Pour the mixture to the remaining egg whites and fold in gently till incorporated.
  7. Pour the batter into a 8" round pan. Bang the pan on the table to get rid of bubbles.
  8. Bake in preheated oven of 170C for 20 minutes.
  9. Turn down the temperature to 160C and bake for 30mins.
  10. Reduce the temperature to 150 deg.C and bake for a further 5 to 10mins to brown the surface.
  11. Remove from the oven and invert the pan. Remove the cake from pan when it's completely cooled.
  12. Cut cooled cake into 3 layers and decorate accordingly.

Thursday, December 16, 2010

Prawn Fritters With Vegetables

When night falls, I have many thoughts in my mind but when I'm sitting in front of the computer, my mind goes blank.  Blogging definitely needs inspiration to keep the entry interesting.  But today, my brain needs some rest.  I've been sleeping for 4 hours daily for the past 2 months as there are simply too many chores.  No, my house is not in tip top condition but the daily marketing, cooking, washing, cleaning, laundry is enough to exhaust me.  And yes, DH is overseas again, I think I only get to see him for a week or two in a month.  With DH away, I'm taking over his chores and I'm completely exhausted by 11pm.  And when I lie on the bed at 1am - 2am (alright, I skived, I did catch some movies on cable/surf the net for some ME TIME), my brain just can't stop working, thinking of the many events that happened and what's going to happen/prepare the next day.  Then , I'm in the state of insomnia again, almost every night.  I do not know what time I fall asleep but I will be awaken by DD3 for feed at least once and by 7am, the whole family is awake.

I initially thought this will be a short and quick entry but it took me almost 2 hours to complete.  Gosh, better stop now and get my butt moving, need to walk the dog.


Prawn Fritters With Vegetable Recipe
Recipe by Anncoo

Ingredients
100g prawns
1 onion - shredded (I used small onions)
1 small Carrot - grated or cut to thin match sticks
some finely cut spring onion or coriander leaves
Some salt and pepper

For the Batter
Ingredients
1 Egg yolk with enough water to make 150ml
3/4 cup Plain flour
1 1/2 tbsp Rice flour

Method


    1. Remove shell and vein from prawns then cut to cubes not too small. Season with some pepper and salt.
    2. Combine the batter ingredients together in a measuring cup and blend into a smooth texture paste.
    3. Add enough oil (its usually sunflower/corn oil in my pantry) for shallow frying with two drops of sesame oil in wok.
    1.  In a medium bowl add prawn cubes, grated carrot, shredded onions and spring onion together.
    1. Then add about 2-3 tbsp of batter (not too thick) into the prawn mixture.
    2. Drop the coated prawn mixture in small portion into hot oil gently with a fork and spoon and shallow fry till golden brown. Dish up and drain oil well.
    3. Serve with mayonnaise or dipping sauce.

    Thursday, December 2, 2010

    Steamed Brownie

    I'm not a brownie lover, especially when we're talking about dense and dry brownies.  But when I saw this in Edith's blog, I knew I must try it as it is steamed!  Yes, you've heard me alright, steamed.

    This is a very simple recipe, no fuss at all.

    It doesn't taste very much like the regular store bought brownie, the texture and taste are entirely different.

    Please pardon the pictures as I used natural lightings but it was a scorching hot day and the rays were too strong.  I should have adjusted the brightness level but I was plain lazy.

    Steamed Brownie
    Source: Magic Steamed Cake
    Recipe seen here

    Ingredients
    (A)
    100g butter
    85g chocolate

    (B)
    170g castor sugar
    3 eggs (large)

    (C)
    20g cocoa powder
    170g plain flour
    1 1/4 tsp double action baking powder
    1/2 tsp baking soda

    (D)
    120g chopped walnut

    Method
    1. Melt chocolate and butter over double boiler till chocolate melted. Set aside.
    2. Whisk egg with sugar till sugar dissolved. Add in cooled chocolate mixture. Mix well.
    3. Sieve C and then it to the chocolate/egg mixture.
    4. Add the walnuts.
    5. Pour into a 8" X 8" square pan (or 22 X 20cm).
    6. Steam on high for 30 mins. Set aside to cool.
    7. Coat with ganache (I omit as I was lazy again)